A flat tire is an unexpected inconvenience that can quickly become a significant safety hazard if not addressed correctly. Many drivers understand the need to change a flat tire but are often uncertain about the critical first step: safely and correctly positioning the vehicle jack. Improper jack placement poses serious risks, from significant vehicle damage to severe personal injury. This comprehensive guide will meticulously detail the universally recognized safe jack points, explain the underlying structural principles, and provide a step-by-step methodology to ensure your tire change is performed securely and efficiently in 2026 and beyond.
Understanding the Criticality of Proper Jack Point Identification
📤 Share Image
The act of lifting a vehicle, even momentarily, places immense stress on its structure. Understanding the basics and fundamentals of where to position a jack is not merely a recommendation; it’s a critical safety imperative. Incorrect placement can lead to catastrophic consequences, affecting both the vehicle’s structural integrity and the individual performing the tire change.
Structural Integrity: Reinforced vs. Non-Reinforced Areas
Modern vehicles, whether unibody or body-on-frame, are designed with specific areas capable of bearing the immense weight of the vehicle during lifting. These are the reinforced points, engineered with thicker steel, additional bracing, or specialized pads. Attempting to lift a vehicle from a non-reinforced area—such as a body panel, plastic trim, or a suspension component not designed for direct lifting—will inevitably result in bending, crushing, or breaking the component, potentially compromising the vehicle’s long-term safety and functionality.
Safety Hazards: The Peril of Incorrect Placement
The most immediate and severe consequence of improper jack placement is the risk of jack slippage or a sudden vehicle collapse. A vehicle weighing several thousand pounds falling from even a few inches can generate tremendous force. This can lead to severe personal injury, including crushing limbs, broken bones, or even fatality. As industry observations indicate, a significant percentage of DIY automotive repair accidents are linked to improper vehicle lifting techniques, underscoring the necessity for strict adherence to safety protocols. Serious injuries can arise from scenarios where a jack slips from a greasy suspension component or collapses a rusted pinch weld, pinning the unsuspecting individual beneath. This grim overview highlights why precise jack placement is an absolute requirement.
Vehicle Damage: More Than Just a Scratch
Beyond immediate safety risks, improper jacking can inflict substantial and costly damage to your vehicle. Common examples include bent pinch welds, crushed rocker panels, punctured fuel lines, damaged brake lines, compromised suspension components (e.g., control arms, shock mounts), or even crushed exhaust pipes. Electrical wiring and plastic underbody shields are also vulnerable. Such damage can be expensive to repair and, in the case of brake or fuel lines, dangerously impair your vehicle’s operation.
The Definitive Role of the Owner’s Manual
The absolute important primary source for identifying correct jack points is your vehicle’s owner’s manual. This document, specific to your make, model, and year (including 2026 models), provides diagrams and explicit instructions for safe lifting. It accounts for all model-specific exceptions and design nuances. Neglecting to consult it is akin to navigating an unfamiliar route without a map; while you might get lucky, the risks are significantly elevated.

Identifying Universal and Vehicle-Specific Jack Points
While the owner’s manual offers definitive guidance, a general understanding of common jack points is invaluable. These universal locations, combined with vehicle-specific markings, form the foundation of safe lifting practices for various vehicle types, from sedans to heavy-duty trucks.
Common Jack Point Locations
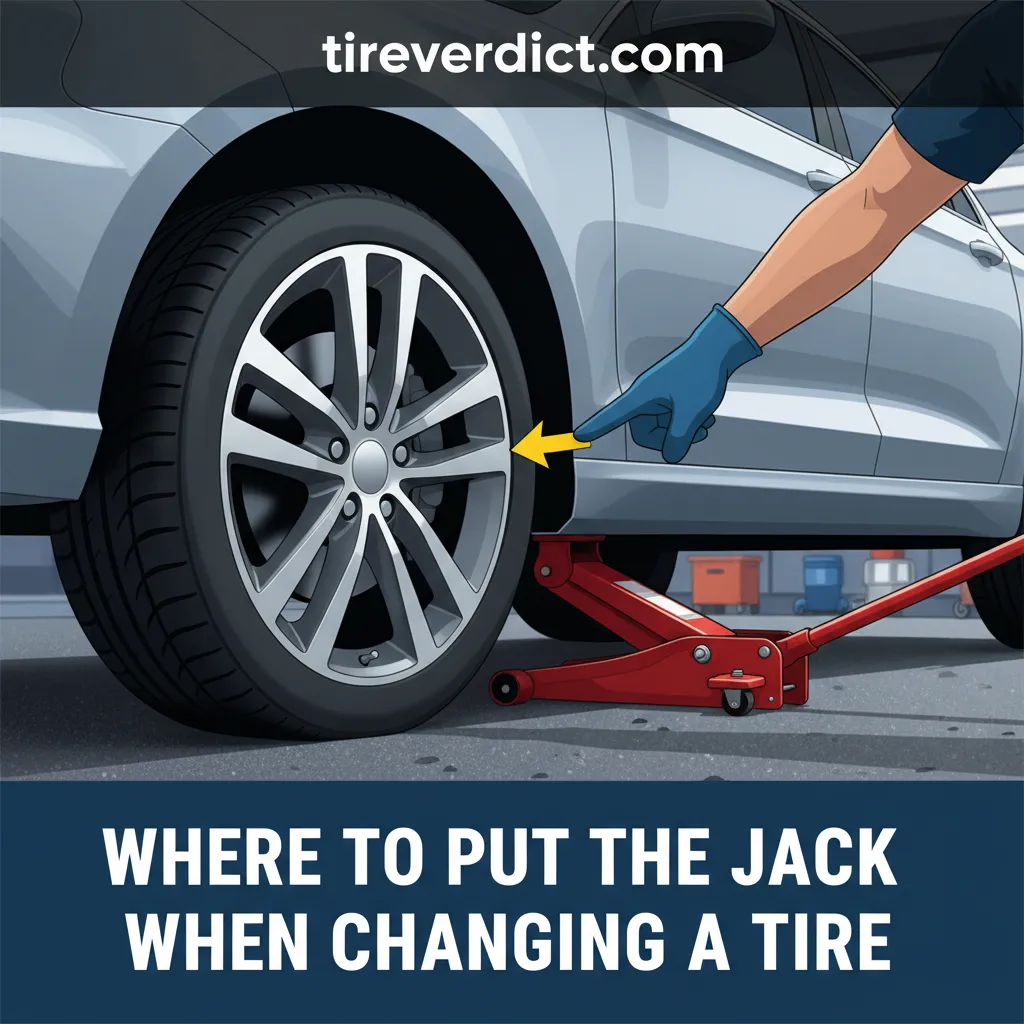
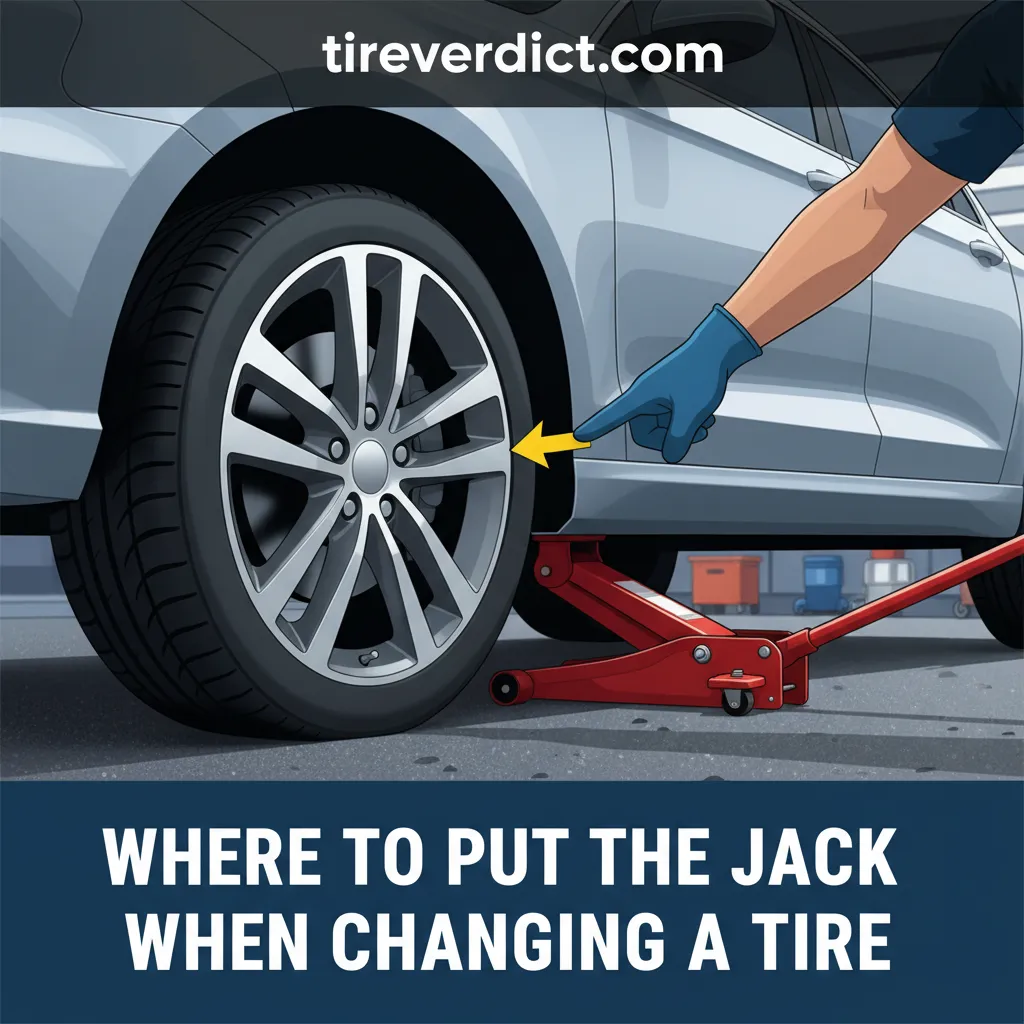
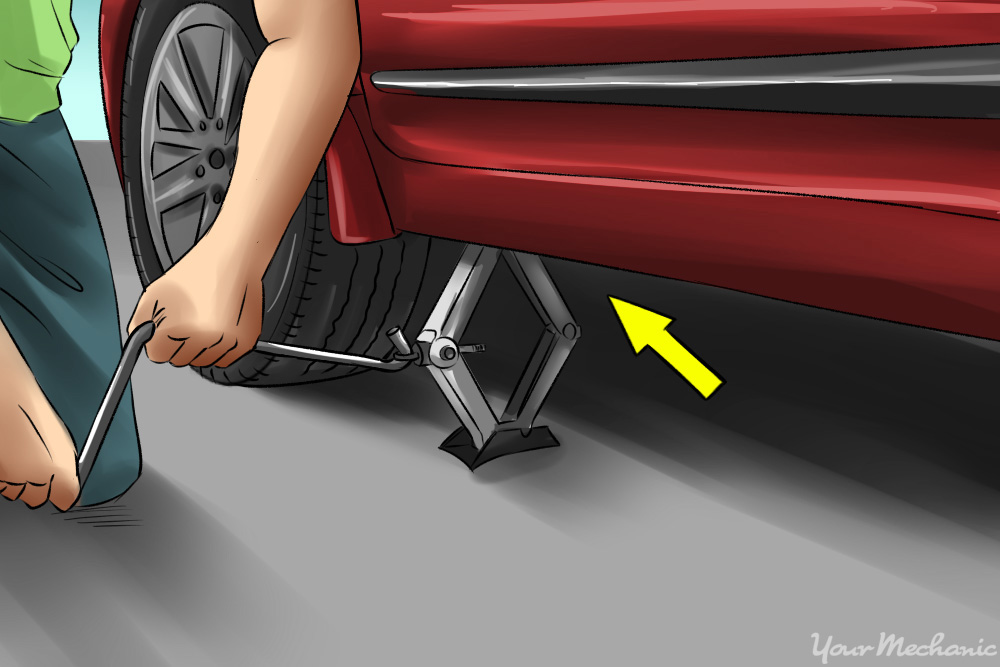
- Pinch Welds: These are arguably the most common jack points on unibody vehicles (the vast majority of cars, crossovers, and smaller SUVs). They appear as a folded metal seam running along the bottom edge of the vehicle, just behind the front wheel and in front of the rear wheel. When using a jack on a pinch weld, ensure the jack’s head, especially if it’s a scissor jack, has a slot or a rubber pad designed to straddle the weld, preventing it from bending or crushing.
- Frame Rails: For body-on-frame vehicles (e.g., many pickup trucks, larger SUVs, and some older sedans), the sturdy, rectangular frame rails are ideal jacking points. On unibody vehicles, robust cross-members or reinforced sections of the subframe might also serve this purpose. These provide a broad, strong surface for the jack.
- Designated Lift Pads/Points: Increasingly common, especially on vehicles manufactured post-2010, are clearly marked lift pads or indentations. These are often small, reinforced blocks or recessed areas beneath the vehicle, sometimes indicated by arrows, symbols, or even a small sticker on the rocker panel. These are purpose-built for lifting and offer the most straightforward and secure placement. Many automotive manufacturers integrate distinct arrows or visual indicators on rocker panels or undercarriage components to guide users to the correct jacking locations, simplifying the process for the owner.
- Axle Points: For vehicles with a solid rear axle (common on trucks, some SUVs, and performance RWD cars), the axle housing itself (not the differential casing or suspension arms) can be used to lift the entire rear of the vehicle. This is typically done with a floor jack and should only be performed on the sturdy, cylindrical part of the axle.
Areas to AVOID at All Costs
Equally important as knowing where to place the jack is knowing where NOT to. Avoiding these areas is fundamental to safety and preventing damage:
- Suspension Components: Control arms, tie rods, shock mounts, and coil springs are not designed to bear the vehicle’s entire weight in a static, localized manner. Lifting from here can bend or break components, leading to alignment issues or catastrophic failure.
- Oil Pans, Transmission Casings, Differential Casings: These are typically cast aluminum or thin steel and are not load-bearing. Lifting from here will almost certainly result in expensive and fluid-leaking damage.
- Plastic Trim or Body Panels: Rocker panels, plastic skirts, or fender wells are cosmetic or lightweight structural elements. They will crush instantly under the vehicle’s weight.
- Exhaust System: Mufflers, catalytic converters, and exhaust pipes are thin-walled and will crush easily, leading to leaks and costly repairs.
- Fuel Lines and Brake Lines: These are highly vulnerable and vital for vehicle operation. Any damage can lead to fuel leaks (fire hazard) or brake failure.
Always perform a visual inspection of the undercarriage. If you’re unsure, refer to your owner’s manual or err on the side of caution and seek professional assistance.
Never place a jack under any component that isn’t explicitly identified as a jack point in your owner’s manual or is visibly reinforced. Doing so risks significant vehicle damage and severe personal injury.
📋
Step-by-Step Guide: Safely Placing the Jack for Tire Change
Before anything else, ensure you are in a safe environment. Gather all necessary tools: your vehicle’s jack, lug wrench, wheel chocks, jack stands, and critically, your owner’s manual. Position your vehicle on a firm, level, non-yielding surface. Avoid soft ground, inclines, or loose gravel. Engage your hazard lights, activate the parking brake, and ensure the transmission is in ‘Park’ (for automatics) or in gear (for manuals).
This step is non-negotiable. Locate the section on tire changes or jacking points in your owner’s manual. Identify the exact, vehicle-specific jack point closest to the tire you intend to service. Pay close attention to any diagrams or special instructions unique to your 2026 model, as manufacturers sometimes introduce subtle design changes.
Place the jack directly and precisely under the identified jack point. Ensure the jack’s head makes full and stable contact with the reinforced surface. For optimal stability, place wheel chocks snugly against the tire diagonally opposite the wheel you are lifting. For example, if changing the front-left tire, chock the rear-right wheel. The use of wheel chocks, particularly when placed on the wheel diagonally opposite the lift point, is empirically shown to significantly reduce the risk of vehicle roll or shift during jacking operations.
Before fully lifting, use the lug wrench to slightly loosen the lug nuts on the wheel you’re about to remove, while the wheel is still on the ground. Then, slowly raise the vehicle just enough so the tire clears the ground. Watch the jack closely to ensure it remains stable, upright, and firmly positioned. If you notice any instability, stop immediately and re-evaluate.
Once the vehicle is lifted, never work under a vehicle supported solely by a jack. Immediately slide properly rated jack stands beneath the vehicle, positioning them on a sturdy frame point or another designated lift point adjacent to the jack. Gently lower the vehicle until it rests securely on the jack stands. The jack should now be unloaded or removed if it obstructs tire removal. This redundant support is an absolute safety measure.

Choosing the Right Jack and Essential Safety Equipment
The jack is only one component of a safe lifting operation. Selecting the correct type of jack and having appropriate supplementary safety gear is paramount to a secure tire change in any situation, from a garage setting to a roadside emergency in 2026.
Types of Jacks and Their Applications
- Scissor Jacks: These are the most common OEM-supplied jacks found in vehicle trunks. They are compact, lightweight, and ideal for roadside emergencies due to their small footprint. However, they can be less stable than other types and require more effort to operate.
- Bottle Jacks: Known for their high lift capacity and compact vertical design, bottle jacks are often preferred for trucks, SUVs, and other heavy vehicles. They require a stable, flat base for operation and are excellent for direct lifting on frame rails or axles.
- Floor/Trolley Jacks: These are primarily garage tools. They offer superior stability, easier positioning due to wheels, and a longer reach, making them highly versatile for various vehicle types. Their broader base distributes weight more effectively, reducing pressure on the ground.
Jack Capacity and Vehicle Weight
It is absolutely critical to select a jack with a weight rating that exceeds the vehicle’s curb weight, or at least the heaviest corner of the vehicle. For instance, if a vehicle weighs 4,000 lbs, a jack rated for 1.5 to 2 tons (3,000-4,000 lbs) is generally adequate for lifting one corner, but using a jack rated significantly higher provides an invaluable safety margin. An undersized jack risks failure under load, leading to immediate collapse and severe hazards.
Indispensable Role of Jack Stands
Jacks are for lifting; jack stands are for supporting. This distinction is fundamental. Jack stands provide a solid, mechanical lock, unlike a hydraulic jack which can slowly bleed down or fail catastrophically. Always use jack stands in pairs, ensuring they are rated for your vehicle’s weight and correctly positioned on stable, reinforced points after the vehicle has been lifted. Gently lower the vehicle onto them to confirm secure seating before performing any work underneath.
By The Numbers
Minimum Safety Factor for Jack Capacity
Vehicle Support from Jack Stands, Not Jack
Certified jack stands are subjected to rigorous testing, and their stated weight capacity typically refers to the support capability per pair. This crucial detail is an important point in ensuring their safe use. Always ensure the combined capacity of your stands exceeds the vehicle’s actual weight.
Wheel Chocks and Additional Safety Gear
Wheel chocks are small blocks (rubber, plastic, or wood) placed against tires to prevent rolling. They are particularly effective on slight inclines or surfaces that might cause the vehicle to shift. Always use them. Additionally, consider personal protective equipment (PPE) such as gloves to protect hands from grime and sharp edges, and safety glasses to shield eyes from debris. For roadside situations, reflective vests or warning triangles are critical for visibility.
Troubleshooting Common Jack Placement Issues and Safety Protocols
Even with the best intentions and knowledge, real-world scenarios can present challenges. Having an understanding of how to troubleshoot common issues and a firm grasp of overarching safety protocols will ensure your tire change is completed securely and without incident.
Addressing Uneven or Soft Ground
A common roadside dilemma is a flat tire occurring on a soft shoulder or an uneven patch of asphalt. Lifting directly from such surfaces is dangerous as the jack can sink or tip. To mitigate this, utilize a robust, flat base under the jack, such as a thick piece of plywood (at least 3/4 inch thick and a foot square) or a sturdy metal plate. This distributes the jack’s load over a wider area. Always prioritize moving to solid, paved ground if at all possible. According to vehicle safety incident reports, a significant proportion of accidents during tire changes or vehicle maintenance involve instability due to compromised ground or improperly positioned jacks/stands. Investing in a stable base can reduce these risks by up to 60% in certain conditions.
Preventing and Rectifying Jack Slippage
Jack slippage usually stems from incorrect placement, an uneven load, or faulty equipment. If a jack begins to slip during a lift, stop immediately. Cautiously and slowly lower the vehicle if safe to do so. Never try to adjust a loaded jack from underneath the vehicle. Once lowered, reassess the situation:
- Is the jack point correctly identified and clean?
- Is the jack head making full, stable contact?
- Is the ground stable and level?
- Is the jack itself functioning correctly and free of defects?
If you cannot identify or rectify the cause of instability, it is always safer to seek professional assistance rather than risking injury.
Handling Damaged or Compromised Jack Points
Over time, especially in regions with road salt, designated jack points like pinch welds can suffer from rust or physical damage (e.g., being bent by curbs). If a primary jack point appears corroded, bent, or otherwise compromised, do not use it. Attempting to lift from a weakened point is extremely dangerous. In such cases, identify an alternative, structurally sound frame point (referencing your owner’s manual for other approved lifting areas if available), or if unsure, the safest course of action is to call for professional roadside assistance or towing. This is a critical point that can prevent significant damage or injury.
Ensuring Vehicle Stability During and After Lift
Throughout the entire process, maintaining vehicle stability is the overarching goal. Beyond proper jack and jack stand placement and wheel chocks, ensure the vehicle’s parking brake is fully engaged. Crucially, no occupants should remain in the vehicle once lifting begins. Once the vehicle is resting on jack stands, perform a gentle ‘stability check’ by lightly rocking the vehicle side-to-side. If there is any movement or instability, lower the vehicle, reassess, and repeat the lifting process.
Post-Operation Safety Check
After the new wheel is on, and the lug nuts are hand-tightened, raise the vehicle slightly with the jack to remove the jack stands. Lower the vehicle completely until the tire is on the ground, then remove the jack. Finally, use the lug wrench to torque the lug nuts to the manufacturer’s specified setting. This is not just a suggestion; over or under-tightening can lead to wheel separation or damaged studs. Always clean up all tools and debris before driving off.
Identifying correct jack points via the owner’s manual or visual inspection is paramount for safety and vehicle integrity. Reinforced areas like pinch welds and frame rails are common, but never use suspension components or plastic trim. Proper technique, stable surfaces, and complementary safety equipment (chock blocks, jack stands) are non-negotiable for any vehicle lifting operation. Prioritize your safety and the longevity of your vehicle by proactively familiarizing yourself with these essential procedures before an emergency arises. Practice safe jack usage and always refer to your specific vehicle’s manual for definitive guidance.
Frequently Asked Questions
Can I use the suspension arm as a jack point when changing a tire?
No, absolutely not. Suspension components like control arms or shock mounts are not designed to bear the entire weight of the vehicle for lifting purposes. Using them can cause severe damage to the suspension system, compromise vehicle alignment, or, critically, lead to the jack slipping and the vehicle collapsing, resulting in serious injury.
Where should I place the jack if my vehicle has a unibody construction?
For unibody vehicles, the primary jack points are typically reinforced pinch welds along the rocker panels or designated, often marked, reinforced areas on the subframe. Always consult your vehicle’s owner’s manual to precisely locate these points, as incorrect placement can cause significant structural damage to the undercarriage.
Is it safe to use only the vehicle’s jack to hold it up while changing a tire?
No, it is highly unsafe to rely solely on the vehicle’s jack for support. A jack is primarily a lifting device, not a stable support mechanism. Once the vehicle is lifted, always use properly rated jack stands placed on a solid, level surface to support the vehicle’s weight before proceeding with any work underneath or around it.
How do I find the jack points on a truck or body-on-frame SUV?
For body-on-frame vehicles like trucks and many SUVs, safe jack points are typically the robust frame rails, often located directly behind the front wheels and in front of the rear wheels. The owner’s manual will provide exact locations and any specific lifting instructions. Avoid jacking on axles or differentials unless explicitly stated in the manual for that purpose.
What should I do if I can’t locate the designated jack points or the ground is uneven?
If you cannot locate the designated jack points, or if the ground is soft, uneven, or unstable, do not proceed with lifting the vehicle. Attempting to change a tire under such conditions is extremely dangerous and risks damage to your vehicle or severe personal injury. It is safer to call for roadside assistance or a tow truck.