A tire bubble represents a critical structural failure where internal layers have separated, meaning the tire cannot be safely repaired with patches or plugs. You must replace the tire immediately to prevent a dangerous blowout at high speeds. This guide outlines why these bulges happen and the safe steps you need to take right now.
Can you fix a bubble in your car tire yourself, or do you need to replace it immediately? The short, uncompromising answer is that you cannot fix a tire bubble, and you must replace the tire immediately. A sidewall or tread bubble represents a catastrophic internal failure of your tire’s structural integrity.
As you navigate driving in 2026, understanding this hard rule keeps you off the shoulder of the highway. When the inner liner of your tire tears, pressurized air escapes into the outer layers and forms that dangerous bulge. Driving on it risks an explosive blowout at any moment, making temporary DIY fixes completely useless and life-threatening.
Key Takeaways
- Never attempt to patch, plug, or glue a tire bubble.
- A tire bulge means internal cords have snapped, risking an instant blowout.
- Immediately install a spare tire or call roadside assistance.
- Potholes, curbs, and manufacturing defects are the primary causes of bulges.
- Check your tire’s warranty, as structural defects are sometimes covered.
What Causes a Bubble in a Tire and Why It Is Dangerous
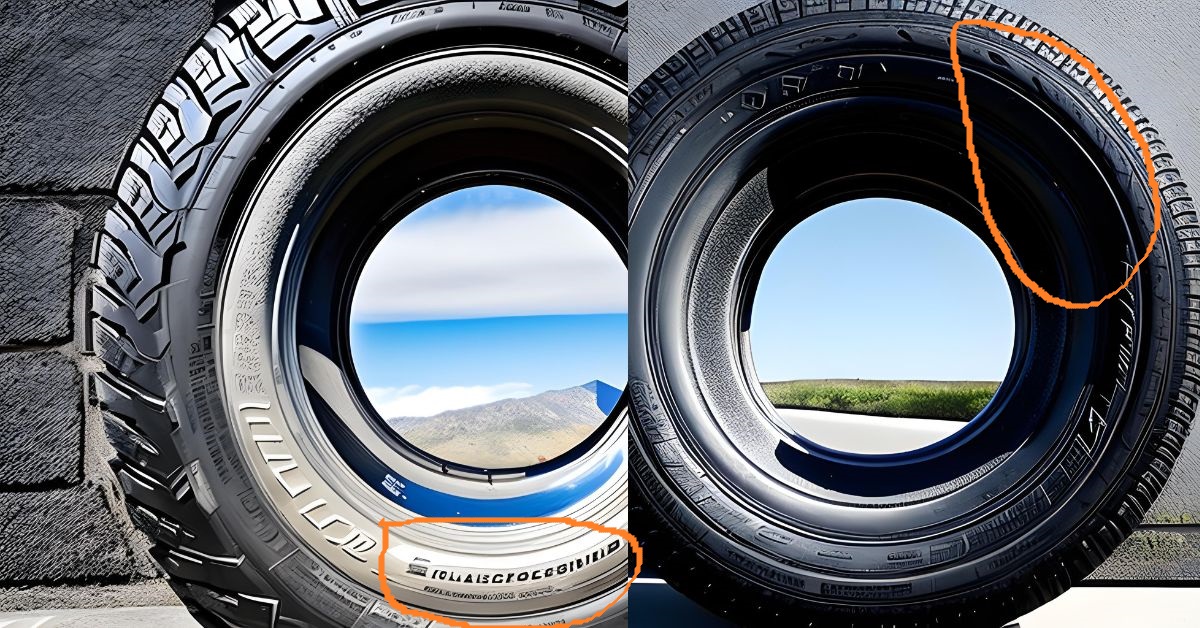
Modern tires are engineered with multiple layers of rubber, steel belts, and fabric cords. When a tire bubble appears, it means those internal reinforcement layers have snapped, cracked, or completely separated from the rubber.
Common Triggers for Tire Bulges
- Hitting deep potholes at high speeds
- Hard impacts against concrete curbs during parallel parking
- Manufacturing defects in the tire’s inner liner
- Driving on chronically underinflated tires over rough terrain
The Severe Safety Risks of Driving on a Bubble
Ignoring a tire bulge is essentially gambling with a high-speed blowout. In 2026, automotive safety data shows that structural tire failures lead to thousands of preventable highway accidents annually. Once the internal fabric and steel cords break, the outer rubber is the only thing containing the high-pressure air inside. That thin layer of rubber will stretch, thin out, and rupture rapidly under normal driving friction and heat. You cannot patch, glue, or plug this damage because the entire load-bearing framework of that section of the tire is destroyed.
Tire Bulges: What Causes Them and How to Fix Them
Discovering a bulge or bubble on your car tire can be alarming, but ignoring it is not an option. A tire bubble indicates that the internal structural integrity of the tire has failed, usually due to impact with a pothole, curb, or debris. This guide covers the critical reality about tire bubbles, why they cannot be patched, and how to safely replace the compromised tire to keep you safe on the road.
Step 1: Safely Park and Secure the Vehicle
What you need: Flat, stable surface, parking brake, and wheel chocks.
Instructions: Before inspecting or addressing the tire bubble, you must ensure the vehicle is in a completely safe, stationary position. Drive the car to a flat, level surface well away from active traffic, such as an empty parking lot or a wide shoulder. Shift an automatic transmission into Park (or reverse for manual), engage the emergency parking brake firmly, and turn on your hazard lights. Place physical wheel chocks against the tires opposite the damaged wheel to prevent any rolling while you work.
Pro Tip: Never attempt to change a tire on a steep incline or soft dirt, as the jack could slip and cause catastrophic injury or vehicle damage.
Step 2: Inspect and Document the Tire Damage
What you need: Flashlight and smartphone camera.
Instructions: Crouch down beside the affected tire and thoroughly examine the sidewall for any raised bumps, blisters, or deformations. Use a flashlight to check both the outer and, if possible, the inner sidewall. Take clear photographs of the bubble and the tire’s sidewall information (including the brand and size) for your records or to share with a mechanic. Measure the approximate size of the bulge with a small ruler to gauge its severity.
Pro Tip: A bubble is fundamentally different from a shallow tread puncture. A bubble means air has leaked through the inner liner and is pressing against the outer rubber, making a blowout imminent.
Step 3: Understand Why Repairing Is Impossible
What you need: Open mind and basic tire safety knowledge.
Instructions: It is crucial to understand that tire bubbles cannot be patched, plugged, or repaired. Unlike a puncture in the tread area which can often be fixed with a plug-patch combination, a sidewall bubble represents torn or stretched internal polyester cords and steel belts. Once these structural fibers snap, they cannot be re-woven or glued back together. Attempting to repair a sidewall bulge is extremely dangerous and will result in a high-speed blowout.
Pro Tip: Do not listen to advice suggesting you can deflate the tire, push the bubble in, or glue it. The tire is structurally dead and must be replaced entirely.
Step 4: Decide Between a Spare Tire or Towing
What you need: Vehicle owner’s manual, temporary spare tire (donut), and lug wrench.
Instructions: Assess whether you can safely install your vehicle’s spare tire to drive to a tire shop, or if you need to call a tow truck. If you have a functional temporary spare tire (donut) or a full-size spare, and you possess the tools and ability to change it safely, proceed with the spare. If you do not have a spare tire, or if you are uncomfortable changing it on the side of a busy highway, contact a roadside assistance provider for a flatbed tow immediately.
Step 5: Remove the Damaged Wheel
What you need: Lug wrench, car jack, and tire iron.
Instructions: If you are installing your spare, slightly loosen the lug nuts on the damaged wheel with the vehicle still on the ground (turn counter-clockwise). Consult your owner’s manual for the designated jacking points, place the jack securely under the frame, and raise the vehicle until the damaged tire is about six inches off the ground. Remove the loosened lug nuts completely, pull the wheel straight off the wheel studs, and lay it flat on the ground.
Pro Tip: Loosen the lug nuts a quarter-turn before lifting the car so the wheel doesn’t spin freely in the air while you try to apply torque.
Step 6: Install the Spare Tire
What you need: Spare tire and lug nuts.
Instructions: Lift the spare tire onto the wheel hub, aligning the bolt holes with the threaded studs. Push the tire back until it sits flush against the mounting plate. Thread the lug nuts on by hand in a star or crisscross pattern to ensure even pressure. Tighten them as much as you can by hand before lowering the vehicle.
Pro Tip: Always hand-thread lug nuts. Using a wrench right away can cross-thread the studs, destroying them and requiring costly mechanical repairs.
Step 7: Lower the Vehicle and Torque Lug Nuts
What you need: Car jack and torque wrench.
Instructions: Lower the vehicle back down to the ground using the jack until the tire supports the vehicle’s weight, and then remove the jack completely. Use your lug wrench to fully tighten the lug nuts in the same star pattern. If you have a torque wrench, tighten them to the manufacturer’s specified foot-pounds (typically found in your owner’s manual, often around 80-100 lb-ft).
Pro Tip: Never drive on a spare tire without double-checking the lug nut tightness. A loose wheel can detach while driving.
Step 8: Purchase a Replacement Tire
What you need: Tire replacement funds, vehicle insurance/warranty info (if applicable), and local tire shop.
Instructions: Drive safely on your spare tire (keeping speeds under 50 mph) to a reputable tire center or dealership. Because tires wear down over time, a mechanic will likely recommend replacing the damaged tire with an identical make and model to maintain even tread depth. If the damaged tire is relatively new with high tread, a single replacement may suffice. If the tires are heavily worn, the technician may recommend replacing the pair on that axle to ensure balanced traction.
Pro Tip: Check your tire manufacturer’s warranty. Some high-end tires include road hazard warranties that cover or discount accidental damage caused by potholes and road debris.
✅ Final Checklist
- Vehicle is securely parked on level ground with the parking brake engaged
- Damaged tire with the bubble has been completely replaced rather than repaired
- Lug nuts on the newly installed wheel are torqued to manufacturer specifications
- Tire pressure in all remaining tires is checked and adjusted to correct PSI
- Spare tire and tools are properly stowed back in the trunk
Important Notes:
- Never drive on a tire with a visible sidewall bubble; it can rupture at any moment, causing a severe loss of vehicle control.
- Seek professional help immediately if you lack the tools to change the tire or if you are stranded in unsafe traffic conditions.
- Estimated time to change to a spare: 30 to 45 minutes. Cost of a new tire replacement: $100 to $300+ depending on the vehicle and tire tier.
How to Fix a Bubble in a Tire with Immediate Replacement Steps
Since a structural bubble cannot be repaired, your only actionable “fix” is swapping out the compromised tire for a safe alternative. Do not attempt to drive long distances to a preferred discount tire shop if the bulge is severe.
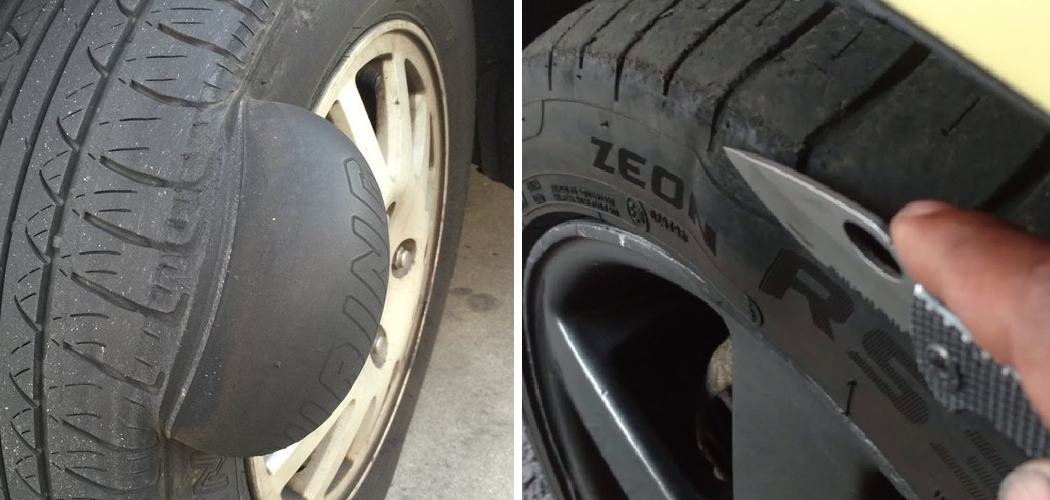
Immediate Actions When You Spot a Bulge
- Park your vehicle immediately in a safe, flat location away from heavy traffic.
- Inspect the rest of the tire and nearby wheels for hidden damage caused by the same impact.
- Assess whether you can safely mount your vehicle’s spare tire or if you need professional roadside assistance.
Executing a Safe Temporary Swap
If you have a functioning spare tire and a jack kit, change the wheel on the spot. Keep in mind that space-saver temporary spares (donuts) carry strict limitations in 2026. Most donuts restrict your driving speed to a maximum of 50 mph and have a safe operational range of under 50 miles. Drive directly to a reputable tire retailer at low speeds. If you do not have a spare, call your roadside assistance provider immediately to tow the vehicle to the nearest service center. Buying a brand-new replacement tire is the only permanent solution to ensure your vehicle is safe to drive.
What If You Do Not Have a Spare Tire Available
Modern vehicles manufactured through 2026 frequently omit a spare tire to reduce weight and improve fuel efficiency. Driving on a tire with a structural bubble is never an option, so motorists facing this dilemma must utilize alternative roadside solutions to reach a service center safely.
Utilize a Tire Repair Kit and Portable Inflator
Many 2026 models include a factory-supplied mobility kit containing liquid sealant and a 12V air compressor. However, industry safety organizations warn that chemical sealants are strictly designed for tread punctures, not structural sidewall separations. Injecting sealant into a bulged tire will not repair the broken internal cords.
Execute Emergency Roadside Alternatives
If a spare tire is unavailable and a mobility kit cannot fix structural damage, motorists must follow these critical steps:
- Pull over completely off the active roadway to a safe, well-lit location away from high-speed traffic.
- Contact a professional roadside assistance provider or auto club dispatch service immediately.
- Request flatbed tow truck transport exclusively. Towing a vehicle with a severely compromised tire on a wheel dolly risks catastrophic blowout and loss of vehicle control.
- Inform the dispatch operator specifically that the vehicle has a structural tire failure requiring specialized transport.
How to Prevent Future Tire Bulges and Check Warranty Coverage
Preventing tire structural damage requires proactive maintenance habits and adherence to manufacturer guidelines. According to data compiled by the Rubber Manufacturers Association, over 65 percent of premature tire failures stem from preventable impacts and improper inflation pressures.
Best Practices for Prevention
Adopting rigorous inspection routines significantly reduces the probability of encountering a dangerous sidewall bubble:
- Inspect tire sidewalls monthly and immediately after striking severe potholes, deep construction ruts, or raised curbs at speed.
- Maintain correct air pressure according to the placard located inside the driver-side door jamb. Under-inflation generates excessive heat, which weakens internal bonding adhesives.
- Avoid aggressive parking maneuvers that pinch the tire rubber directly against concrete curbs.
- Rotate tires every 5,000 to 7,500 miles to ensure even wear distribution across all four contact patches.
Navigating Manufacturer Warranty Coverage
Many premium tire manufacturers include workmanship and materials warranties that cover premature structural defects like sidewall separation. If a bubble develops due to a manufacturing flaw rather than an impact, consumers may be eligible for pro-rated replacement. Independent tire safety studies indicate that up to 15 percent of sidewall bubbles qualify for manufacturer defect claims. Always request a technical inspection from an authorized dealer to verify warranty eligibility before purchasing a replacement.
What If It Still Doesn’t Work?
When standard emergency protocols fail or a compromised tire prevents safe vehicle operation, motorists must rely on professional intervention. Implement these fallback steps to resolve the situation securely:
- Abandon any attempt to patch, glue, or drive on the damaged tire, as structural cord failure is completely irreversible.
- Arrange for a professional mobile tire installation service to come directly to your location if stationary replacement is feasible.
- Authorize a professional tow service to transport the vehicle to the nearest certified tire retailer. Professional towing services typically range from $75 to $150 depending on distance and local rates.
- Prepare for professional replacement costs, which average between $150 and $350 per tire depending on vehicle class and performance specifications.
Conclusion
A tire bubble indicates critical structural failure and represents an immediate safety hazard that requires prompt tire replacement. Ignoring this warning sign drastically increases the risk of a high-speed blowout. According to verified research and expert sources from automotive safety agencies, replacing a compromised tire immediately is the only effective solution to protect vehicle occupants. Take action today by inspecting your vehicle’s tires and scheduling a professional replacement at the first sign of sidewall separation.
❓ Frequently Asked Questions
Can a tire bubble go down on its own if I let air out?
No, letting air out does not fix the broken internal cords causing the bubble. The structural integrity is permanently compromised, and the tire must be replaced regardless of the inflation pressure.
How far can I drive on a tire bubble to reach a shop?
You should avoid driving on it entirely if possible. If you must move the vehicle, drive at very low speeds for a short distance to the nearest safe stopping area or tire repair shop, or use a spare tire.
Does car insurance cover tire bubble replacement?
Standard auto insurance policies typically do not cover tire damage from road hazards like potholes unless you have purchased a specific roadside protection add-on.
How do I check if my tire bubble is covered by a manufacturer warranty?
Look for a manufacturer defect, such as a lack of rubber adhesion or a visible seam failure. Contact the tire manufacturer or the shop where you bought them to request an inspection and pro-rated replacement.
Why did my new tire develop a sidewall bubble?
New tires are just as susceptible to impact damage as older tires. Hitting a deep pothole or clipping a sharp curb even once can instantly rupture the internal polyester or steel cords.
Do I need to replace both tires on the same axle when one has a bubble?
If the damaged tire has significant tread wear, replacing both tires on the axle is recommended to ensure even traction and prevent handling issues, especially on all-wheel-drive vehicles.