A slow leak can be safely repaired at home using a standard tire plug kit and household soapy water. Finding the exact puncture site is the most critical first step before reaming and inserting the plug. Always ensure safety by working on level ground and knowing when the damage is too severe for a DIY fix.
Fixing a slow leak in your car tire yourself is entirely possible with a standard plug kit and a few basic tools. You do not need to visit a tire shop and wait hours just to patch a simple nail hole.
Taking care of this in 2026 saves you both time and money. A proper DIY plug stops air loss immediately, keeping your commute safe and your tire pressure stable.
Key Takeaways
- Use soapy water in a spray bottle to locate tiny bubbles indicating air leaks.
- Never attempt a DIY plug if the puncture is located on the tire sidewall.
- Always remove the foreign object using pliers before inserting the tire plug.
- Use the rasp tool to roughen and clean the puncture channel thoroughly.
- Check tire pressure immediately after the repair and monitor it over 24 hours.
How to Safely Diagnose and Find a Slow Leak in a Tire
Using the Soapy Water Test
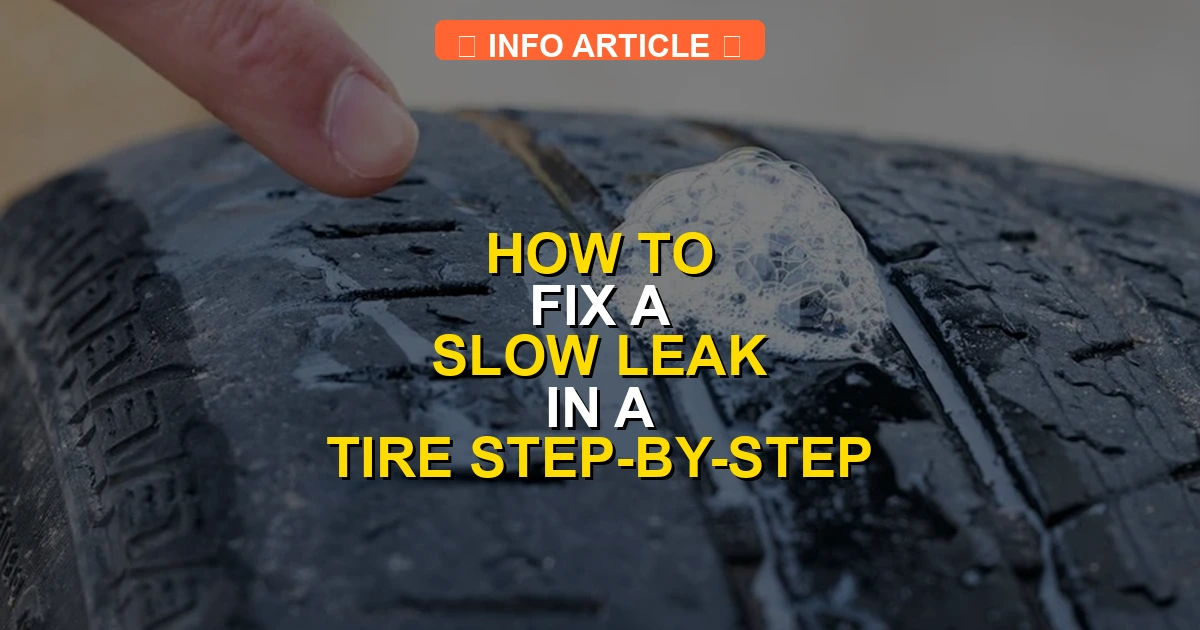
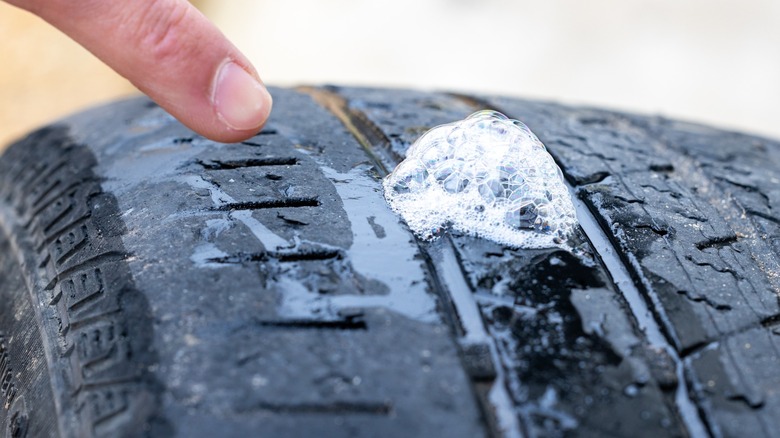
Mix a few drops of dish soap with water in a spray bottle. Inflate your tire to the recommended PSI listed on your driver-side door jamb. Spray the entire tread, sidewall, and valve stem generously. Watch for expanding bubbles or a steady stream of foam. This indicates escaping air.
Checking the Valve Stem and Bead
If the tread looks clear, apply your soapy mixture directly to the valve core. Bubbles here mean your valve core is loose or failing. You can tighten it using a valve core tool. Also inspect the inner and outer rim edges where the rubber meets the metal wheel. Corrosion or minor impacts can cause bead leaks.
- Spray valve core and threads thoroughly.
- Inspect rim edges for hidden debris or corrosion.
- Note the exact location of any bubbling.
Fixing a Slow Tire Leak Made Easy: Your Essential Action Plan
Dealing with a tire that constantly loses pressure can be frustrating, but ignoring it can lead to dangerous blowouts or ruined sidewalls. This comprehensive guide will walk you through the entire process of locating and permanently repairing a standard tread puncture using a plug kit, saving you a costly trip to the mechanic shop. By following these methodical steps, you can safely restore your tire’s integrity in about 30 minutes.
Step 1: Locate the Culprit
What you need: Spray bottle filled with soapy water (a few drops of dish soap mixed with water), a flashlight, and a pair of pliers.
Instructions: Park your vehicle on a flat, safe surface, engage the parking brake, and turn off the engine. Generously spray the soapy water mixture all over the tread and sidewalls of the slow-leaking tire. Watch closely for the formation of expanding bubbles, which indicate escaping air. Systematically check the entire circumference of the tread. If you spot a nail, screw, or piece of glass embedded in the rubber, use your flashlight to inspect it closely and confirm it is the source of the leak.
Pro Tip: Do not remove the foreign object just yet; leaving it in place prevents the tire from going completely flat while you prepare your repair tools.
Step 2: Lift and Secure the Vehicle
What you need: Lug wrench, vehicle jack, and sturdy wheel chocks.
Instructions: Before lifting the vehicle, place wheel chocks securely around the tires that will remain on the ground to prevent rolling. Use your lug wrench to loosen the lug nuts on the affected wheel by about a quarter turn counterclockwise, but do not remove them completely. Consult your vehicle owner’s manual to locate the designated jacking point closest to the flat tire. Position your jack and carefully raise the vehicle until the flat tire is suspended a few inches off the ground, ensuring the setup is stable before proceeding.
Pro Tip: Never place any part of your body under a vehicle supported solely by a hydraulic jack; always use a jack stand for ultimate safety.
Step 3: Remove the Wheel and Extract the Object
What you need: Pliers or needle-nose pliers and the lug wrench.
Instructions: Completely remove the loosened lug nuts by hand and set them aside in a safe place, such as the inside of your hubcap, so they do not get lost. Carefully pull the wheel straight toward you off the wheel studs and lay it flat on the ground. Take your pliers and firmly grip the head of the embedded nail, screw, or wire. Pull it straight out of the tire tread with a firm, steady motion. Be prepared for a rush of remaining air to escape once the object is removed.
Pro Tip: Note the angle at which the object entered the tread, as you will want to insert your repair tools at that exact same angle.
Step 4: Prepare the Puncture Channel
What you need: Spiral rasp tool included in your tire repair kit.
Instructions: Grab the spiral rasp (often called the reamer tool) from your tire repair kit. Insert the rasp directly into the puncture hole, matching the exact angle at which the foreign object entered. Push and pull the tool back and forth forcefully several times through the hole. This roughing action cleans out any remaining debris, smooths the internal steel belts, and widens the channel slightly to accommodate the sticky repair plug. You may feel resistance, which is completely normal as the metal rasp cuts through the heavy-duty rubber.
Pro Tip: Avoid twisting the rasp too violently while it is deep inside the tire, as this can snap the metal shaft or damage the internal casing.
Step 5: Insert the Rubber Repair Plug
What you need: T-handle insertion tool and a self-vulcanizing rubber repair strip (plug).
Instructions: Take a sticky rubber plug and thread it through the open eyelet of the T-handle insertion tool until the plug is centered evenly, creating two equal halves on either side of the tool. Apply a generous amount of rubber cement (usually provided in the kit) along the length of the plug. Position the insertion tool directly over the prepared puncture hole at the correct angle. Push the tool straight down into the hole with firm, decisive body weight until only about a quarter-inch of the plug ends remain sticking out above the tread block.
Pro Tip: Do not let the plug slip all the way through into the tire cavity; maintaining that crucial quarter-inch tail is essential for a proper seal.
Step 6: Secure and Trim the Plug
What you need: Razor blade or utility knife and the T-handle insertion tool.
Instructions: With the plug firmly wedged inside the puncture, give the T-handle tool a quick, sharp half-turn and pull it straight up and out of the tire. The slit in the tool’s eyelet should release the plug, leaving it securely lodged inside the rubber. Allow the rubber cement to dry and cure for approximately 3 to 5 minutes. Once dry, take your utility knife or razor blade and carefully slice off the excess rubber material protruding from the tread until it is nearly flush with the surrounding rubber surface.
Pro Tip: Leaving a tiny bit of the plug sticking out (about 1/8 inch) is completely fine, as normal driving friction will quickly wear it down flush.
Step 7: Reinstall the Tire and Inflate
What you need: Portable air compressor or service station air pump, and a tire pressure gauge.
Instructions: Mount the tire back onto the wheel hub studs, ensuring it sits flush against the brake rotor or drum. Thread the lug nuts back on by hand in a star pattern to center the wheel properly. Lower the vehicle back to the ground using the jack, and tighten the lug nuts completely with the wrench in a star pattern. Connect your air compressor to the valve stem and inflate the tire to the manufacturer’s recommended PSI rating, which is typically found on a placard located on the driver-side door jamb.
Pro Tip: Always double-check your tire pressure with a reliable handheld gauge rather than relying entirely on the compressor’s digital readout.
Step 8: Perform a Final Leak Test
What you need: Spray bottle with soapy water and a dry cloth.
Instructions: Spray the newly plugged repair area liberally with your soapy water mixture one final time. Watch the area for 60 seconds to ensure no tiny bubbles are forming around the plug. If bubbles continue to expand or pop, it indicates the seal is imperfect, and you will need to extract the plug and repeat the repair process. If the soapy water remains completely still with no bubbling action, your repair is airtight and fully successful. Wipe the area dry with your cloth and pack away your tools.
Pro Tip: Drive your vehicle gently for a mile or two and re-check the tire pressure the following morning to guarantee the slow leak has been completely resolved.
✅ Final Checklist
- Foreign object completely removed from the tire tread
- Puncture hole properly reamed and cleaned
- Rubber plug inserted securely with exposed tails trimmed flush
- Tire inflated to the precise manufacturer-recommended PSI
- Soapy water test confirms zero bubbling or air leakage
Important Notes:
- Never attempt to repair a puncture located on the tire sidewall or shoulder, as structural integrity cannot be restored in these areas.
- Seek professional help from a certified tire shop if the puncture hole is larger than a quarter-inch in diameter or if you suspect internal tire damage.
- Estimated time for this repair is 30 to 45 minutes, with a total cost of $10 to $20 for a standard tire repair kit.
Step-by-Step Guide to Fixing a Puncture with a Tire Plug Kit
Locating and Removing the Puncturing Object
Mark the leak source with tire crayon or chalk so you do not lose it. Jack up the vehicle slightly to relieve pressure if needed, though you can often patch a tire while mounted. Use pliers to firmly pull out the offending nail, screw, or glass shard. Expect a brief hiss of escaping air.

Reaming and Inserting the Plug
Grab the spiral reamer tool included in your tire repair kit. Push it firmly into the puncture hole and twist it back and forth several times. This cleans out the channel and roughs up the inner steel belts for better rubber adhesion. Next, thread a sticky repair plug through the eye of the insertion tool until it centers evenly.
- Coat the insertion tool and plug with rubber cement if your kit includes it.
- Push the tool straight into the hole until about one-third of the plug remains visible outside.
- Pull the handle straight back out firmly without twisting, leaving the plug securely wedged inside.
Trim the excess plug material flush with the tread using a utility knife. Reinflate your tire to the correct pressure and run your soapy water test one final time over the patch to confirm zero air leaks.
Essential Safety Rules and When a Slow Leak Cannot Be Fixed
Safety must always come first when working around vehicle tires, even for minor repairs like a slow leak. According to Rubber Manufacturers Association (RMA) safety guidelines, never attempt a roadside tire patch or plug on a busy highway shoulder where traffic puts you at high risk. Always move your vehicle to a flat, stable surface, engage the parking brake, and wedge wheel chocks against the opposite tires before lifting the car with a jack.
Furthermore, industry experts emphasize that not all punctures are repairable. Attempting to fix certain types of damage compromises the structural integrity of the tire and creates severe highway hazards.
When a Tire Damage Cannot Be Repaired Safely
- Punctures larger than 1
- Sidewall or shoulder damage: Any puncture located on the tire sidewall or the curved shoulder area near the tread edge cannot be safely patched. Flexing in these areas causes standard plugs to fail.
- Previous improper repairs: If a tire was previously plugged from the outside without a proper inner patch, or has multiple overlapping repairs, technicians recommend a full tire replacement.
- Internal structural damage: If the tire was driven flat for any distance, internal rubber breakdown or bead damage means the tire must be replaced entirely.
What If It Still Doesn’t Work and Troubleshooting Persistent Air Loss
If you applied a plug or used sealant, but your tire pressure continues to drop, the repair has likely failed or a secondary issue is present. Persistent air loss requires a systematic troubleshooting approach to locate the root cause before you experience a dangerous blowout on the road.
Follow these fallback steps if your initial fix does not hold air:
- Re-test with soapy water: Spray the repair site and the entire valve stem area again. If bubbles form around your installed plug, the plug did not seat correctly or the channel is too irregular.
- Check the valve core: A loose or faulty Schrader valve is a common culprit. Tighten it with a valve core tool or apply soapy water to the top of the stem; bubbling here means you need a new $2 valve core.
- Inspect the wheel rim bead: Corrosion, dirt, or minor impacts can break the airtight seal between the rubber tire bead and the metal wheel rim. This requires a professional tire shop to clean and reseal the rim.
- Seek professional help: If DIY methods fail, visit a local certified tire service center. According to 2026 automotive service data, a professional inner patch-and-plug repair typically costs between $25 and $45, while a complete professional valve replacement averages $15 to $30.
Conclusion
Dealing with a slow-leaking tire can disrupt your day, but addressing it quickly prevents premature tire wear and dangerous roadside emergencies. Whether you use a heavy-duty plug kit or temporary sealant, taking a methodical approach ensures a reliable temporary fix. According to verified research and expert sources from the National Highway Traffic Safety Administration (NHTSA), maintaining correct tire pressure also improves fuel efficiency by up to 3 percent. Your actionable next step is to check your tire pressure monitor or manual gauge every morning for the next three days to confirm that your repair is holding air securely.
❓ Frequently Asked Questions
How do I use soapy water to find a slow tire leak?
Mix a few drops of dish soap with water in a spray bottle and coat the entire tread, sidewall, and valve stem. Watch closely for small, continuous streams of bubbles forming, which indicate escaping air.
What tools are included in a standard tire plug kit?
A standard kit includes a reamer tool to clean and roughen the puncture hole, an insertion needle, rubber tire plugs (strings), and rubber cement or vulcanizing solution.
When is tire damage considered unrepairable?
Damage is unrepairable if the puncture is on the sidewall, near the shoulder of the tread, larger than a quarter-inch, or if the tire has been driven flat, causing internal structural breakdown.
Should I apply rubber cement to the tire plug?
Yes, coating the plug and the reamer tool with rubber cement acts as a lubricant for insertion and vulcanizes the rubber to create an airtight seal inside the puncture.
How much air pressure should I put back into the tire after repairing it?
Inflate the tire to the manufacturer’s recommended psi, which is typically found on a placard located on the driver-side door jamb, not the maximum psi listed on the tire sidewall.
Can a leaking valve stem be fixed without replacing the whole tire?
Yes, a leaking valve stem core can usually be tightened with a valve core tool or replaced in minutes for just a few dollars, without needing any tire removal.