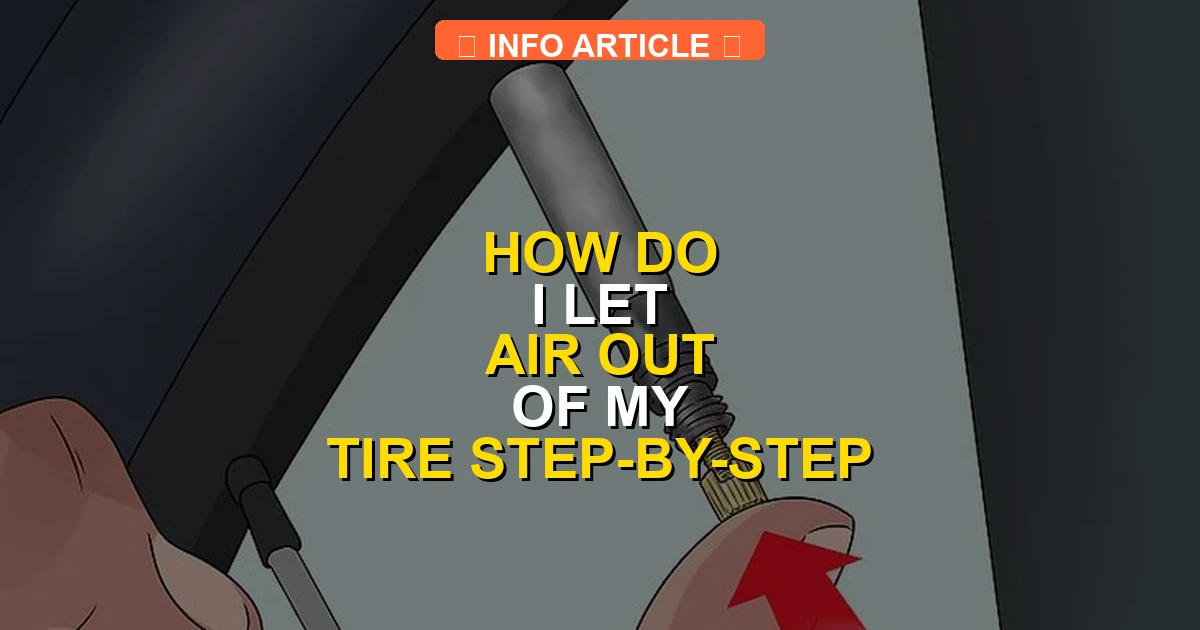
To let air out of your tire, you simply need to remove the valve cap and press the metal pin inside the valve stem. Always use a tire pressure gauge frequently during the process to avoid letting out too much air and dropping below the recommended PSI.
Letting air out of your tire is a straightforward process that simply requires removing the valve cap and pressing the small metal pin inside the valve stem to release pressure. Whether you accidentally over-inflated your tires during a routine 2026 pressure check or you need to soften your ride for a rugged off-road trail, releasing excess air takes less than two minutes.
Getting your tire pressure right ensures optimal fuel efficiency, even tread wear, and a safe, comfortable drive. Knowing how to safely let air out gives you total control over your vehicle’s handling, especially when adjusting to drastic seasonal temperature shifts or changing road conditions.
Key Takeaways
- Park on a flat, safe surface before adjusting your tire pressure.
- Remove the small plastic valve cap by turning it counterclockwise.
- Depress the center pin using a key, pen, or valve core tool.
- Check the PSI frequently with a gauge to reach your target pressure.
- Always securely screw the valve cap back on when finished.
What Causes High Tire Pressure and Why You Need to Deflate
Common Triggers for Over-Inflation
Tire pressure naturally fluctuates based on environmental conditions and mechanical inputs. Knowing what causes these spikes helps you manage your PSI effectively.

- Temperature changes: For every 10-degree Fahrenheit rise in ambient temperature, your tire pressure increases by about 1 PSI.
- Overzealous filling: It is easy to pump too much air into a tire when using a high-speed gas station air compressor.
- Improper initial setting: Filling your tires when they are hot from driving rather than cold often results in an overly high pressure reading once they cool down.
The Dangers of Over-Inflated Tires
Running your vehicle with too much air creates distinct mechanical and safety disadvantages on modern roadways.
- Reduced contact patch: Only the center of the tread presses against the pavement, causing rapid center-tread wear.
- Harsh ride quality: Over-inflated tires transmit every bump, crack, and pothole directly into the cabin.
- Decreased traction: Less rubber touching the road means longer stopping distances and reduced grip in wet weather.
Master Deflating Your Tires in 6 Simple Steps
Deflating your vehicle’s tires is a surprisingly common maintenance task required for navigating deep sand, rocky off-road trails, or correcting an over-inflated tire pressure warning. While it sounds simple, doing it incorrectly can damage your tire valves or leave you stranded with dangerously low pressure. This guide walks you through the safe, precise methods for letting air out of your tires without damaging your hardware or losing vital valve components.
Step 1: Park on Level Ground and Secure the Vehicle
What you need: A flat, stable parking surface and your vehicle’s parking brake.
Instructions: Before touching your tires, ensure your car is safely parked on a level surface away from traffic. Engage your parking brake firmly, and if you drive a manual transmission, leave the car in first gear or reverse. For automatic transmissions, shift firmly into the “Park” position. If you are on an incline or a busy roadside, place wheel chocks around the tires to prevent any accidental rolling. Taking these preliminary safety measures ensures the vehicle remains completely stationary while you manipulate the tire pressure.
Pro Tip: Never attempt to deflate or inflate tires while parked on a steep incline or soft, unstable shoulder, as the vehicle could shift off a jack or roll unexpectedly.
Step 2: Locate the Valve Stem and Remove the Cap
What you need: Your fingers and good lighting (a smartphone flashlight works great at night).
Instructions: Walk around to the specific tire you need to deflate and locate the small rubber or metal protrusion sticking out from the wheel rim, known as the valve stem. Twist the small plastic or metal cap counter-clockwise to unscrew it completely. As you remove the cap, place it somewhere safe and secure—such as your pocket, the vehicle’s dashboard, or the inside of your fuel door—so it does not get lost in grass, dirt, or gravel. The exposed end of the valve stem is now ready for deflation tools.
Pro Tip: Keep a magnetic dish or small cup nearby if you are doing all four tires, ensuring you do not misplace the tiny valve caps.
Step 3: Choose Your Deflation Method
What you need: A tire pressure gauge, and optionally a defator tool, key, pen tip, or valve core removal tool.
Instructions: Decide how fast you want the air to escape based on your situation. If you only need to lower pressure by a couple of PSI (Pounds per Square Inch), you can use a small blunt object like a pen cap, a house key, or the back of a tire pressure gauge to gently press the center pin inside the valve stem. If you are off-roading and need to drop down to single-digit pressures quickly, a dedicated brass tire deflator or unscrewing the internal valve core is much faster. Listen closely for the distinct hissing sound of escaping air once the center pin is depressed.
Pro Tip: Avoid using sharp metallic objects like needles or nails, as they can permanently deform or damage the delicate brass pin inside the valve stem.
Step 4: Monitor the Air Flow and Estimate Timing
What you need: A watch or smartphone timer to track deflation duration.
Instructions: As the air rushes out, keep track of how long you hold the valve open. For standard passenger car tires, pressing the valve core typically releases about 1 PSI every 2 to 3 seconds, though this varies based on your starting pressure. If you are dropping a large off-road truck tire from 35 PSI down to 18 PSI for sand driving, expect the process to take roughly 45 to 60 seconds per tire using a standard manual pin depressor. Periodically stop the airflow to check your progress rather than letting all the air out at once.
Pro Tip: Do not walk away while air is venting, especially if using a mechanical deflator tool, as tires can completely flatten much faster than anticipated.
Step 5: Check Your Pressure with a Reliable Gauge
What you need: A calibrated dial, digital, or pencil tire pressure gauge.
Instructions: Remove your tool or finger from the valve stem to stop the airflow entirely. Take your tire pressure gauge and press it firmly straight onto the valve stem until the hissing stops and the gauge registers a reading. Read the indicator (on a digital screen, sliding bar, or dial face) to see your current PSI. If the pressure is still too high, repeat the deflation process in short, controlled bursts of 2 to 3 seconds, checking the pressure after each burst until you hit your target specification.
Pro Tip: Always measure tire pressure when the tires are “cold”—meaning the car has been driven less than a mile or parked for at least three hours—because driving heats up the air inside, giving falsely high pressure readings.
Step 6: Reinstall the Valve Cap Securely
What you need: The original valve cap retrieved from your pocket or safe spot.
Instructions: Once you have verified that your tire pressure matches your desired target, take your valve cap and thread it back onto the top of the valve stem by turning it clockwise. Tighten it securely with your fingers until it is snug, but do not over-tighten it with pliers, as this can strip the plastic threads or make it impossible to remove next time. The valve cap acts as a critical secondary seal, keeping out moisture, road salt, mud, and debris that could otherwise clog the valve core and cause a slow leak.
Pro Tip: Inspect the rubber O-ring inside the valve cap if you have metal caps; if it is cracked or missing, replace the cap to maintain a watertight seal.
✅ Final Checklist
- Vehicle is safely parked on level ground with the parking brake engaged
- All removed valve caps are safely accounted for and not lost
- Tire pressure has been verified using a trusted digital or analog gauge
- Target PSI matches manufacturer recommendations or off-road requirements
- Valve caps are screwed back on tightly to prevent dirt and moisture buildup
Important Notes:
- Never drive on severely under-inflated tires on public highways, as this generates extreme heat, risks catastrophic tire failure, and destroys the sidewalls.
- If you deflated your tires for off-roading, ensure you have a working 12V air compressor to reinflate them before returning to paved roads.
- Estimated time: 5 to 15 minutes depending on the number of tires and target PSI drop. Cost: $0 (using existing tools) up to $20 for a dedicated deflator gauge.
How to Fix High Tire Pressure: Step-by-Step Deflation Guide
Locating and Preparing the Valve Stem
Before you let any air out, you need to locate the tire valve and gather your basic tools. You will need a reliable tire pressure gauge and a small tool to press the valve core.

- Find the valve stem: Look for a small rubber or metal protrusion sticking out from your wheel rim. It usually has a black or grey plastic cap twisted onto the end.
- Remove the valve cap: Twist the cap counter-clockwise to unscrew it. Put the cap in a secure spot like your pocket so you do not lose it in the grass or dirt.
- Take an initial reading: Press your tire pressure gauge firmly onto the open valve stem to check your starting PSI so you know how much air to remove.
Releasing Air and Monitoring PSI
With the valve exposed, you can now carefully bleed out the excess air until your tires match the manufacturer placard located on your driver-side door jamb.
- Depress the core pin: Use the back of your tire gauge, a small nail, or the tip of a key to gently push the tiny pin located directly in the center of the valve stem.
- Listen for the hiss: You will hear a distinct hissing sound as air escapes. Keep your tool aligned straight so you do not bend the delicate pin.
- Check and repeat: Remove your tool every 3 to 5 seconds and re-check the pressure with your gauge to avoid letting out too much air.
What If Your Tire Keeps Losing Air After Deflating
Sometimes a tire fails to hold pressure correctly after intentional deflation. According to automotive safety guidelines from the Rubber Manufacturers Association, valve cores can become stuck or obstructed by microscopic debris. When this happens, the valve continues to leak air long after you remove the deflation tool.
Checking for Valve Core Leaks
You must verify whether the valve stem itself is the source of the persistent pressure loss. A leaking valve core compromises your adjusted PSI and creates a dangerous driving condition by 2026 industry standards.
- Mix a few drops of dish soap with water in a small spray bottle.
- Remove the black plastic valve cap from the affected tire.
- Spray the soapy water mixture directly onto the open end of the valve stem.
- Observe the opening closely for continuous bubbling or foaming, which indicates an air leak.
- Tighten the valve core inside the stem using a standard four-way valve tool if bubbles appear.
Best Practices for Maintaining Proper Tire PSI
Proper tire inflation maximizes fuel efficiency and extends tread life. Data from the National Highway Traffic Safety Administration shows that maintaining correct tire pressure saves drivers an average of eleven cents per gallon on fuel costs and prevents premature tread wear.
Establishing a Routine Check Schedule
Consistent monitoring ensures your vehicle handles predictably in all weather conditions throughout 2026. Ambient temperatures fluctuate significantly, changing your tire pressure by about one to two PSI for every ten-degree Fahrenheit shift.
- Check your tire pressure once every month using a reliable digital pressure gauge.
- Perform inflation or deflation checks only when the tires are cold, meaning the car has been parked for at least three hours.
- Locate the official manufacturer placard sticker located on the driver-side door jamb for your target PSI specifications.
- Record your pressure readings in a maintenance log or smartphone application to track long-term trends.
- Inspect the tire tread depth and sidewalls for damage during every monthly pressure check.
What If It Still Doesn’t Work?
If manual deflation or valve core adjustments fail to resolve your tire pressure issues, underlying mechanical problems may be present. Consider these fallback steps:
- Replace the entire valve stem assembly if the current one is corroded or cracked, which typically costs between $15 and $30 at a local tire shop.
- Inspect the tire bead for microscopic gaps or rust on the metal wheel rim that allows air to escape slowly over time.
- Submerge the entire wheel assembly in a water tank to locate hidden puncture sites in the rubber tread or sidewall.
- Seek professional help from a certified tire technician if the tire refuses to maintain a stable PSI after troubleshooting. Professional patch repairs generally cost between $20 and $40.
Conclusion
Knowing how to let air out of your tire safely allows you to adjust pressures for off-roading, heavy loads, or uneven wear conditions. By utilizing accurate gauges and following manufacturer specifications, you protect your vehicle suspension and enhance road safety. According to verified research and expert sources from major automotive safety councils, regular pressure maintenance remains one of the single most effective ways to prevent roadside emergencies. Your immediate next step is to grab a digital gauge and verify that all four of your tires match the PSI rating listed on your driver-side door placard today.
❓ Frequently Asked Questions
How do I let air out of my tire without a pressure gauge?
While you can press the pin to release air, it is strongly advised against doing so without a gauge. Without measuring, you risk letting out too much air and driving on an dangerously underinflated tire.
What happens if I accidentally let too much air out of my tire?
If you release too much air, your tire pressure will drop below the safe operating limit. You will need to use a portable air compressor, a bicycle pump, or visit a gas station air pump to reinflate it.
Can letting air out damage the valve stem?
As long as you press gently and straight down on the center pin, you will not damage the valve stem. Forcing objects into the stem at an angle can bend the pin and cause a permanent air leak.
Why is my tire pressure too high in the first place?
Tire pressure naturally rises as tires heat up from driving or when ambient temperatures increase significantly. It is common to need a pressure adjustment during changing weather seasons.
Is it safe to let air out of a hot tire?
Tires gain pressure when hot, so measuring them immediately after driving will yield a falsely high reading. It is best to check and adjust pressure when the tires are cold for the most accurate PSI.
How long does it take to deflate a car tire completely?
Pressing the valve stem pin usually releases air at a steady, moderate pace, taking anywhere from 30 seconds to a couple of minutes to lower the pressure by a few PSI.