Yes, you can sometimes repair a run-flat tire with a nail, but only if the tire was never driven on while completely deflated and the puncture is strictly in the tread. Most major tire manufacturers and automakers officially advise against repairing run-flats due to hidden sidewall fatigue.
The short answer is yes, you can repair a run-flat tire with a nail in it, but only under very specific and strict conditions. If you recently found a nail in your tread and your tire pressure monitoring system alerted you before the tire completely deflated, there is a strong chance a professional tire shop can patch it for you in 2026.
However, getting that nail fixed safely depends entirely on how the tire was driven after the puncture occurred. Because run-flat tires are engineered with reinforced sidewalls to keep your car moving even with zero air pressure, drivers often log miles on a completely deflated tire without realizing the internal structural damage that occurs.
Key Takeaways
- Run-flats can only be repaired if they maintained proper pressure before the fix.
- Punctures must be in the tread area, under 1/4 inch wide.
- Driving even one mile on zero pressure permanently destroys the internal sidewall structure.
- Most vehicle manufacturers officially recommend immediate tire replacement over patching.
- A standard professional patch-plug combo is mandatory for any approved repair.
What Causes Run-Flat Tire Failure After a Nail Puncture
When a nail pierces your tread, the immediate air loss is only half the battle. The true danger to a run-flat tire happens when the weight of your vehicle presses down on a completely uninflated sidewall.
Driving on Low Pressure Destroys the Internal Structure
Standard tires warp and go completely flat immediately, forcing you to pull over. Run-flats do the opposite, allowing you to drive up to 50 miles at speeds up to 50 mph. This convenience masks severe internal distress. As you drive without air, the reinforced rubber sidewalls flex excessively, generating extreme internal heat. This heat breaks down the chemical bonds inside the tire, causing the inner liner to crumble, shred, or separate from the casing. If this structural breakdown happens, the tire is permanently compromised and cannot be safely repaired, even if the nail hole itself is tiny.
The Golden Rule of Run-Flat Repairability
To determine if your run-flat tire can be saved from a nail puncture, tire technicians evaluate two non-negotiable factors:
- Zero Zero-Pressure Miles: You must have stopped immediately or driven only a negligible distance while the tire pressure dropped. If the tire ran completely flat, it is trash.
- Standard Puncture Criteria: The nail must be located squarely in the tread area, measuring under 1/4 inch in diameter, with no punctures in the sidewall or shoulder.
Repairing a Run Flat Tire: What Causes It and How to Fix It
Discovering a nail embedded in your premium run-flat tire can be stressful, but understanding the nuances of repair is vital for your safety and wallet. This comprehensive guide covers whether your specific puncture can be saved, the strict industry standards for internal repairs, and the precise physical workflow required to restore your tire’s integrity. Follow these actionable instructions carefully to safely get back on the road without unnecessarily buying an expensive replacement tire.
Step 1: Assess the Damage and Location
What you need: Flashlight, tire pressure gauge, soapy water spray bottle.
Instructions: Safely park your vehicle on a flat, stable surface and engage the parking brake. Locate the nail using your flashlight and check the surrounding tread. To be safely repairable, the puncture must be located strictly within the tread block area, specifically within the central three-quarters of the tread width. Punctures that occur on the tire’s shoulder or sidewall cannot be repaired under any circumstances because the sidewall flexes too much and bears the primary structural load of a run-flat tire.
Pro Tip: Never pull the nail out yet; leaving it in prevents complete air loss and helps you locate the exact angle of the puncture channel later.
Step 2: Evaluate Run-Flat Integrity and Distance Traveled
What you need: Vehicle odometer, tire pressure monitoring system (TPMS) readouts.
Instructions: Determine how far and how fast you drove on the tire while it was underinflated or completely flat. Standard run-flat tires are engineered to travel a maximum distance of 50 miles at speeds not exceeding 50 miles per hour after losing pressure. If you exceeded these manufacturer limits, the internal sidewalls likely suffered irreversible structural breakdown, overheating, and crumbling rubber residue inside the casing. Inspect the inner liner of the tire visually if possible; if you see rubber dust or deep wrinkles, the tire is permanently compromised and must be replaced.
Pro Tip: If your TPMS alerted you immediately and you drove less than 10 miles at low speeds, your tire is a strong candidate for a successful professional-grade repair.
Step 3: Remove the Tire from the Wheel Rim
What you need: Hydraulic jack, jack stands, lug wrench, tire mounting machine or bead breaker.
Instructions: Jack up the vehicle securely, remove the wheel assembly, and completely deflate the tire by removing the valve core. Because run-flat tires feature exceptionally stiff, reinforced sidewalls, removing them from the alloy wheel requires significant mechanical leverage. Use a professional tire machine to carefully break the stiff inner and outer beads without damaging the tire pressure sensor or scratching the wheel face. Never attempt to patch a run-flat tire from the outside using a standard external string plug, as tire manufacturers and safety councils strictly prohibit external-only plugs for run-flat technology.
Pro Tip: Run-flat beads are notoriously stiff and can snap cheap manual tire irons; take the wheel to a local tire shop if you lack an automated pneumatic tire changer.
Step 4: Inspect the Interior Liner
What you need: Inspection light, rubber scraper, clean microfiber cloth.
Instructions: Once the tire is dismounted, thoroughly inspect the entire inner rubber liner for signs of catastrophic damage, heat stress, or powdery black rubber residue. Run your bare hand carefully along the inside circumference (wear protective gloves to avoid sharp debris) to feel for any internal bumps, ripples, or separated plies caused by driving under-inflated. If the inner liner feels smooth and uniform with no visible wrinkles or structural distortion, you can proceed with the interior patch-plug combination method.
Step 5: Clean and Prep the Puncture Channel
What you need: Low-speed pneumatic drill, carbide cutter drill bit (usually 3mm or 6mm), vacuum cleaner.
Instructions: Pull the nail out of the tread if you haven’t already. Insert a low-speed carbide cutter bit into a pneumatic drill and carefully ream out the puncture channel from the inside out, following the exact angle at which the nail entered. This cleans out debris, removes damaged steel belts, and creates a uniform cylindrical hole for the repair stem. Vacuum away all loose rubber shavings and steel dust from the interior cavity of the tire to ensure proper chemical bonding.
Pro Tip: Always drill at a low RPM to prevent frictional heat build-up, which can melt the surrounding rubber compounds and ruin the repair surface.
Step 6: Buff and Apply Chemical Vulcanizing Cement
What you need: Low-speed buffer wheel, chemical vulcanizing rubber cement, scraper tool.
Instructions: Using a specialized low-speed buffing tool, gently roughen up a circular area around the puncture on the inner liner that is slightly larger than the patch head you will use. This exposes fresh, bonded rubber fibers. Vacuum the buffed area completely clean. Apply a generous, even layer of chemical vulcanizing rubber cement over the buffed area and directly inside the drilled channel. Allow the cement to dry completely until it becomes tacky to the touch (usually 3 to 5 minutes), following the manufacturer’s chemical cure instructions.
Step 7: Install the Combination Patch-Plug Unit
What you need: Combination patch-plug unit, wheel roller, pliers or insertion tool.
Instructions: Remove the protective backing from the rubber patch. Insert the metal or coated wire leader of the patch-plug stem through the prepared puncture hole from the inside of the tire. Grab the leader with pliers from the outside tread side and pull firmly until the rubber stem seats snugly and the back of the patch flatly adheres to the inner liner. Use a metal stitching roller to firmly roll over the entire surface of the patch from the center outward, eliminating any trapped air bubbles and ensuring an airtight mechanical bond.
Step 8: Trim and Re-mount the Tire
What you need: Utility knife, tire mounting lubricant, air compressor, bead blaster.
Instructions: Using a sharp utility knife, trim the excess rubber stem protruding from the outside tread down so it sits flush with or slightly below the surrounding tread blocks. Apply fresh tire mounting lubricant liberally to the wheel rim beads. Carefully re-mount the run-flat tire onto the wheel using the tire machine, taking extreme care not to pinch the stiff sidewalls. Inflate the tire using an air compressor until the beads firmly seat against the rim flange (usually around 35 to 40 PSI, then adjust to your vehicle door-placard specification).
Pro Tip: Dunk the re-mounted and inflated tire into a water tank or spray the repair area with soapy water to check for any escaping micro-bubbles before putting it back on the car.
✅ Final Checklist
- Puncture location confirmed to be strictly within the central tread area, not the shoulder or sidewall.
- Internal tire liner inspected and found free of wrinkles, dust, or structural breakdown from low-pressure driving.
- Puncture channel cleaned, reamed at the correct angle, and prepped with vulcanizing cement.
- Combination patch-plug properly installed, rolled flat, and trimmed flush with the outer tread.
- Tire pressure checked, balanced, and verified free of leaks using a soapy water test.
Important Notes:
- Never attempt to repair a run-flat tire if the puncture exceeds 1/4 inch (6mm) in diameter, or if there are multiple overlapping punctures.
- Seek professional help from a certified tire technician if you lack specialized run-flat mounting equipment, as improper manual leverage can ruin the expensive tire beads.
- Estimated time for a professional repair is 45 to 60 minutes, with a typical shop cost ranging from $25 to $50 if dismounting and balancing are required.
How to Safely Fix a Nail in a Run-Flat Tire Step-by-Step
If you meet the strict criteria for a safe repair, you cannot simply slap a standard plug into the tread. Fixing a run-flat tire requires a rigorous, multi-step professional process.

Internal Inspection and Patching
A safe run-flat repair requires removing the tire entirely from the wheel rim to inspect the interior lining for hidden heat damage. A surface plug is never enough for these specialized tires.
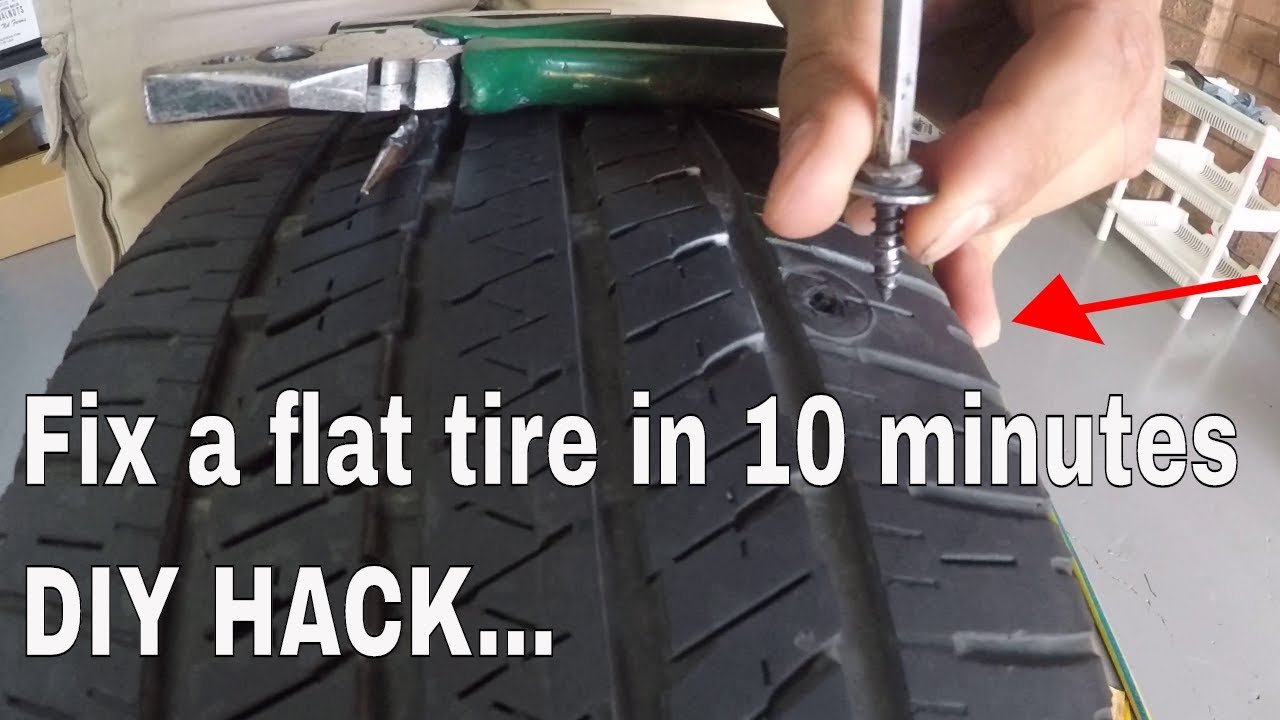
- Demounting the Tire: The technician removes the tire from your wheel to look at the inner sidewalls and liner for signs of rubber powder, crumbling, or wrinkling caused by low-pressure operation.
- Probing the Puncture: The nail channel is cleaned and reamed to prep the rubber for a permanent seal.
- Combination Repair: A quality shop will install a one-piece patch-plug combination unit. This seals the inner liner with a rubber patch while filling the nail hole completely to keep moisture out.
Manufacturer Stances and Real-World Advice
It is worth noting that major automotive brands like BMW, Mercedes-Benz, and MINI, along with tire manufacturers like Bridgestone and Pirelli, traditionally advise against repairing run-flat tires. Their official 2026 stance stems from liability and the difficulty of detecting micro-damage caused by zero-pressure driving. However, the Rubber Manufacturers Association (RMA) states that run-flats can be repaired up to two times if they meet standard puncture rules and were never driven flat. Always choose a certified tire technician who is willing to demount the tire and verify its internal health before taking your money.
What If It Still Cannot Be Repaired and Requires Replacement
When a run-flat tire sustains damage that violates safety protocols, professional repair is strictly prohibited. Tire manufacturers like Bridgestone and Pirelli state that a compromised run-flat must be replaced entirely rather than patched. Driving on low pressure alters the internal structural integrity of the stiffened sidewalls.
Recognizing Unrepairable Damage
A nail puncture instantly triggers a mandatory replacement scenario if specific environmental thresholds are met. Technicians will refuse a patch if the puncture exceeds a quarter-inch diameter. Damage located on the structural shoulder or the reinforced sidewall also results in automatic tire rejection. Furthermore, operating the vehicle at zero pressure for more than the recommended 50-mile limit destroys the internal casing.
Replacement Execution Steps
- Source an exact equipment match for the punctured tire to maintain balanced handling across all four wheels.
- Transport the vehicle via flatbed tow truck or drive carefully at reduced speeds below 50 miles per hour to a certified tire service center.
- Expect replacement costs ranging from $250 to $500 per tire, depending heavily on the wheel diameter and speed rating.
- Verify that the technician resets the tire pressure monitoring system sensors during the mounting and balancing process.
What If It Still Doesn’t Work?
Drivers facing a situation where a run-flat tire cannot be plugged or safely patched must rely on alternative fallback measures. Ignoring expert safety guidelines risks catastrophic structural failure at highway speeds. Take these structured fallback steps if standard repair procedures fail:
- Inspect the remaining tread depth on the opposite axle tire; if wear exceeds 4/32 of an inch, replace both tires to maintain proper drivetrain synchronization.
- Utilize an emergency roadside assistance program or manufacturer warranty coverage to transport the vehicle safely to the nearest authorized dealer.
- Investigate whether your tire purchase included a road hazard warranty, which frequently covers free replacement or prorated discounts for unrepairable punctures.
- Prepare for professional service costs, keeping in mind that replacing a high-performance run-flat tire generally averages between $300 and $600 including labor and balancing fees in 2026.
Conclusion
Determining whether you can repair a run-flat tire with a nail depends entirely on the puncture location, the severity of the damage, and whether the tire was operated without air pressure. While minor tread punctures are often fixable, structural sidewall damage demands immediate replacement. According to verified research and expert sources from leading tire manufacturers, prioritizing safety over temporary fixes prevents dangerous blowouts. Your actionable next step is to take the vehicle to a certified tire specialist for a thorough internal inspection before hitting the road.
❓ Frequently Asked Questions
Can you repair a run-flat tire with a nail in the sidewall?
No, punctures located in the sidewall or shoulder of a run-flat tire can never be repaired. Any damage outside the flat tread area requires immediate tire replacement for safety reasons.
How can I tell if my run-flat was driven on while flat?
A technician must dismount the tire to inspect the inner liner. If you see rubber dust, wrinkles, or crumbling material inside, the tire was compromised by zero-pressure driving and cannot be patched.
Do run-flat tires lose pressure slower than standard tires?
Run-flats do not necessarily lose air slower, but their reinforced sidewalls prevent the vehicle from sagging dramatically when a nail causes a slow leak.
Can you put a regular non-run-flat tire on a car that came with run-flats?
Yes, you can replace run-flats with standard tires, but your vehicle will no longer have a spare or temporary mobility method since it likely lacks a jack and spare tire well.
Will a run-flat tire patch hold up as long as one on a regular tire?
If the tire was never driven deflated and the repair is performed correctly with a patch-plug combo, it will last for the remaining usable tread life of the tire.
Can a run-flat tire with a nail be plugged multiple times?
No, safety standards dictate that no tire—run-flat or standard—should receive more than two repairs, and they must be spaced well apart in the tread area.