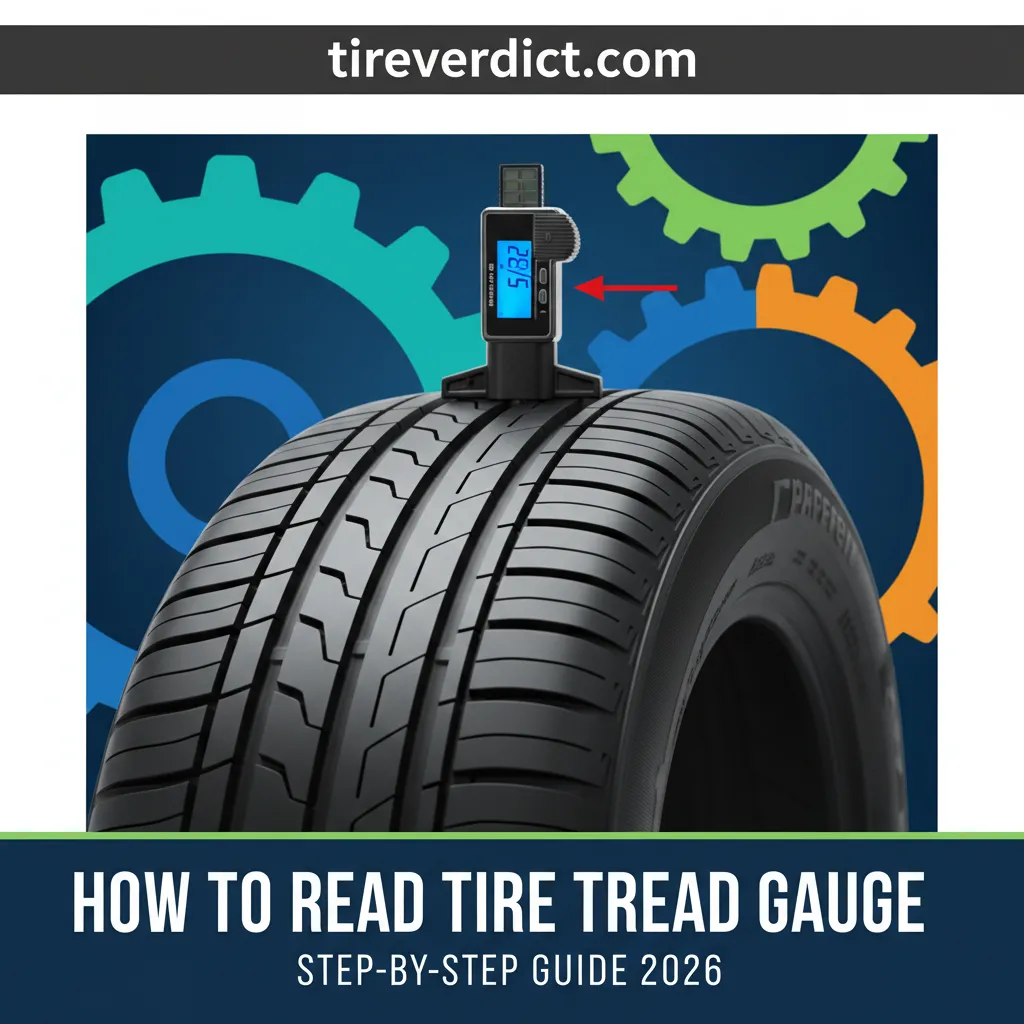
How To Read Tire Tread Gauge: Step-By-Step Guide 2026
Ensuring optimal vehicle safety and performance begins with diligent maintenance, and regularly monitoring your tire tread depth stands as a paramount practice. Many drivers recognize the importance of healthy tires but often lack the precise methodology to accurately utilize a specialized tread gauge, leading to uncertainty regarding tire replacement timing. This comprehensive guide will empower you to master the process of reading a tire tread gauge, providing clear, step-by-step instructions, essential insights into interpreting readings, and expert tips to confidently assess your tires’ condition, ensuring your peace of mind on every journey.
Understanding Tire Tread Depth: The Foundation of Road Safety
📤 Share Image
The seemingly simple grooves on your tires are, in fact, sophisticated engineering marvels, meticulously designed to perform critical functions. Understanding their role is the first step to truly mastering tire tread measurement. As an industry expert with over 15 years in automotive maintenance, I can unequivocally state that proper tread depth is not merely a recommendation; it is an absolute necessity for road safety and vehicle performance in 2026.
The Critical Role of Tire Tread
The engineered tread patterns on your tires are crucial for several reasons. Primarily, they are designed to evacuate water from beneath the tire contact patch, preventing hydroplaning. Without sufficient tread, especially in adverse conditions like heavy rain, your vehicle’s tires essentially float on a layer of water, losing all traction. This direct correlation between diminished tread depth and increased hydroplaning risk is a critical safety consideration.
Consider this: a new passenger tire typically boasts a tread depth of 10-12/32nds of an inch (or 8-10mm). In wet conditions, these deep grooves efficiently channel water away. However, as tread wears down to the legal minimum of 2/32nds of an inch, its ability to evacuate water drastically diminishes. Research indicates that a vehicle with tires at 2/32″ can take significantly longer to stop on wet pavement compared to one with new tires, sometimes increasing stopping distances by multiple car lengths – a difference that can be catastrophic.
Legal and Safety Minimums for Tread Depth
Across most jurisdictions, the legally mandated minimum tread depth is 2/32nds of an inch (1.6mm). Operating a vehicle on tires below this threshold is not only illegal but also incredibly dangerous. The severe safety implications include significantly reduced grip, particularly in wet or slippery conditions, and a substantially increased accident risk. Even beyond legal requirements, industry bodies and safety advocates recommend proactive tire replacement at a higher threshold for enhanced safety.
Impact of Worn Tread on Vehicle Dynamics
Insufficient tread depth compromises nearly every aspect of vehicle dynamics. It substantially increases stopping distances, particularly on wet roads, where the tire struggles to maintain friction. Handling becomes sluggish and unpredictable, especially when cornering or making evasive maneuvers. While less direct, severely worn tires can also subtly affect fuel efficiency due to increased rolling resistance and elevate the risk of tire punctures or sudden blowouts, as the structural integrity of the tire diminishes with reduced rubber thickness.
Factors Accelerating Tread Wear
To truly understand tire wear, it’s essential to recognize factors that accelerate it. These include:
- Aggressive Driving Habits: Rapid acceleration, hard braking, and aggressive cornering put immense stress on tires, leading to faster wear.
- Improper Wheel Alignment: Misaligned wheels cause tires to drag or scrub, resulting in uneven and accelerated wear patterns.
- Consistent Under or Over-inflation: Incorrect tire pressure leads to uneven contact with the road, concentrating wear on the edges (underinflation) or the center (overinflation).
- Environmental/Road Conditions: Frequent driving on rough roads, gravel, or in extreme temperatures can also contribute to quicker wear.
Being aware of these factors helps you take preventative measures, extending the life of your tires and maintaining optimal safety.
By The Numbers: The Criticality of Tread Depth
Legal Minimum Tread
Recommended Replacement (Wet Weather)
Typical New Tire Depth
Approx. Increase in Wet Braking Distance from 4/32″ to 2/32″ (NHTSA)
Selecting and Preparing Your Tire Tread Gauge for Accurate Measurement
Before you can accurately read a tire tread gauge, it’s essential to select the right tool and ensure it’s prepared for precise application. As a seasoned technician, I’ve used countless gauges, and while all serve the same purpose, their usability and precision vary.
Types of Tire Tread Gauges
There are three principal categories of tread gauges:
- Digital Gauges: These offer high precision and clear, easy-to-read digital readouts, often switchable between imperial (32nds of an inch) and metric (millimeters). They typically range from $15-40.
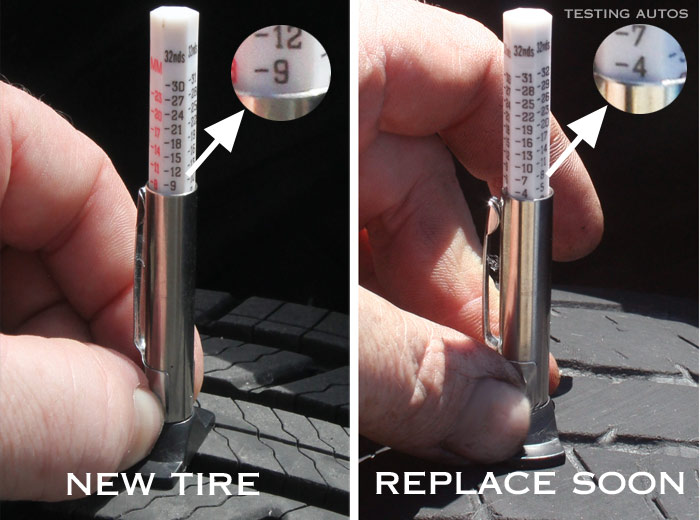
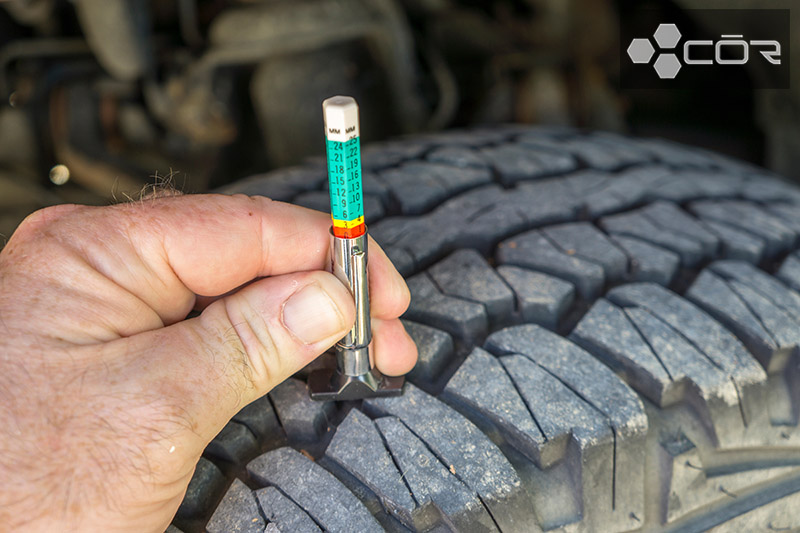
- Analog/Pen-Style Gauges: Economical and highly reliable, these gauges use a sliding probe and a marked scale. They are durable, require no batteries, and are a mechanic’s staple. Prices generally fall between $5-15.
- The ‘Coin Method’: While not a gauge, the “penny test” (using Abraham Lincoln’s head) is a common informal check. It’s rough and only indicates if you’re above the 2/32″ minimum, offering no precise depth or wear pattern detection. It’s a quick check, but never a substitute for a proper gauge.
Understanding Gauge Scales and Units
Tread depth is commonly measured in 32nds of an inch (imperial) or millimeters (mm) (metric). It’s crucial to know which unit your specific gauge uses. For instance, a digital gauge might display “5/32″” or “4.0mm.” An analog gauge will have markings, where each major line might represent 1/32″ or 1mm. Misinterpreting the scale can lead to inaccurate assessments, potentially compromising safety. Always confirm the units your gauge is displaying or marked with.
Essential Pre-Measurement Gauge Checks
Before taking any measurements, inspect your gauge.
- Physical Damage: Check for bent probes, cracks, or loose components. A bent probe on an analog gauge, for example, will prevent it from seating correctly, leading to incorrect readings.
- Smooth Operation: Ensure the probe moves freely and smoothly without sticking. Lubrication might be needed for older analog gauges.
- Digital Gauge Specifics: For digital models, verify battery life and perform a ‘zero’ calibration if available. This typically involves closing the probe and pressing a ‘zero’ button to ensure accuracy.
Industry standards for calibrated gauges often allow for very tight tolerances, emphasizing the value of a precise tool.
Preparing the Tire for Measurement
Proper tire preparation is simple but vital for an accurate reading.
- Vehicle Positioning: Ensure your vehicle is parked safely on a level, stable surface, allowing easy access to all tire surfaces.
- Clear Debris: Visually inspect the tire grooves and clear any obstructions like small stones, mud, or debris. These can prevent the gauge probe from reaching the true base of the tread.

Mastering the Tire Tread Gauge: A Step-by-Step Measurement Guide
This section provides a definitive, sequential procedure to help you learn and master accurate tread depth measurement. Following these steps precisely will yield reliable data for assessing your tire’s condition. In 2026, consistent, accurate self-assessment of your tires is easier than ever with the right tools and knowledge.
📋
Step-by-Step Guide: Reading Your Tire Tread Gauge
Park your vehicle on a flat, stable surface. Engage the parking brake and, if applicable, place the transmission in “Park.” Ensure the steering wheel is straight, especially for front tires, to provide unobstructed access to the entire tread surface. Your safety is paramount before you begin any inspection.
Identify the main, largest circumferential grooves that run around the tire. These are the primary channels for water evacuation and are where official tread depth measurements should be taken. Avoid measuring sipes (small, thin slits) or superficial aesthetic patterns, as these do not represent the tire’s functional tread depth.
Carefully insert the gauge’s slender probe into one of the chosen main grooves. Ensure the probe is positioned perpendicular (at a 90-degree angle) to the tread surface. Push the probe fully until its tip contacts the very base of the groove. An angled insertion will yield an artificially higher, inaccurate reading.
While the probe is fully inserted, press the gauge’s base (the flat shoulder of the tool) down firmly and squarely against the adjacent tread block. This action ensures that the gauge’s body is flush with the tire’s surface, accurately measuring the probe’s extension from the surface down to the groove’s base.
For digital gauges, read the number directly from the screen. For analog gauges, carefully lift the gauge, ensuring the probe remains locked in position, and identify the highest visible mark on the scale. Note down the measurement immediately in the appropriate units (32nds of an inch or millimeters). For example, a digital gauge showing “5/32″ or an analog gauge with its marker at the ‘5’ line (assuming 1/32” increments).
This is a crucial step for a comprehensive assessment. Repeat steps 3-5 at a minimum of three distinct locations around the tire’s circumference (e.g., at 12 o’clock, 3 o’clock, and 6 o’clock). Additionally, take measurements at various points across the tread’s width (inner, middle, and outer shoulder) within each circumferential location. This multi-point approach is vital for detecting uneven wear patterns that could indicate alignment issues or improper inflation. For example, a single tire might show readings like: ‘Front Left, Outer: 5/32″, Middle: 6/32″, Inner: 4/32″‘. Regularly checking your tires, perhaps every 10,000 miles or quarterly, helps monitor wear progression effectively.
Interpreting Your Tread Depth Readings: What the Numbers Mean for Your Safety
Once you’ve diligently measured your tire tread, the next essential step is to interpret those readings. This is where the numbers translate into actionable insights about your vehicle’s safety and performance.
Deciphering Tread Depth Ranges: New vs. Worn
To make informed decisions, categorize your readings:
- New/Excellent (10-12/32″ or 8-10mm): Full performance, maximum water evacuation. Typical new tire depth for passenger vehicles.
- Moderate Wear (5-7/32″ or 4-5.5mm): Good condition, but performance, especially in wet weather, will start to subtly decrease compared to new.
- Caution Zone (4/32″ or 3.2mm): Significant reduction in wet braking performance and increased hydroplaning risk. Many experts recommend considering replacement here, particularly if you frequently drive in rain or snow.
- Critical/Replacement Zone (2/32″ or 1.6mm): Legal minimum. Performance is severely compromised in wet conditions. Immediate replacement is crucial for safety.
Identifying and Diagnosing Uneven Wear Patterns
Discrepancies in your multi-point readings are key diagnostic indicators:
- Wear in the Center: Often points to overinflation. The tire bulges slightly, concentrating wear in the middle.
- Wear on Both Edges: Typically indicates underinflation. The tire sags, causing the edges to bear more load and wear faster.
- One-Sided Wear (Inner or Outer Edge): Strongly suggests alignment issues (camber or toe) or worn suspension components. If your front left tire consistently shows 3/32″ on the inner edge and 7/32″ on the outer, suspect a misaligned front end.
- Feathering or Cupping: These wavy or scalloped patterns often point to worn shocks, struts, or other suspension problems.
Diagnosing these patterns allows you to address underlying mechanical faults, saving money and improving safety.
When to Consider Tire Replacement
While the absolute legal minimum for tire replacement is 2/32nds of an inch, expert consensus, including data from the National Highway Traffic Safety Administration (NHTSA), strongly recommends proactive replacement at 4/32nds of an inch. Below this threshold, especially in regions with significant wet weather, the tire’s ability to grip the road and resist hydroplaning is substantially compromised. The trade-off between maximizing tire life and ensuring optimal safety should always lean towards safety. Remember, while average tires can last 40,000-60,000 miles under optimal conditions, tread depth is the ultimate indicator.
Understanding Tire Tread Wear Indicators (Wear Bars)
All modern tires come equipped with Tread Wear Indicators (TWIs), often called ‘wear bars.’ These are small, raised bars molded into the main circumferential grooves of the tire. When your tread depth has worn down to 2/32nds of an inch, these wear bars become flush with the surrounding tread surface, serving as a clear visual warning sign that the tire has reached its legal limit and requires immediate replacement. They are a quick, at-a-glance check, but a gauge provides a more precise and actionable measurement.
Think of tire tread depth in terms of water channeling. At 4/32″, your tire still has decent channels. Below this, those channels become shallower and less effective, significantly increasing your risk of hydroplaning and extending braking distances on wet roads. Prioritize replacing tires at 4/32″ for improved wet weather performance and safety in 2026.
Beyond the Gauge: Comprehensive Tire Tread Monitoring and Professional Consultation
While the tire tread gauge is an indispensable tool, a truly comprehensive assessment of tire health goes beyond a single number. Integrating visual inspections and understanding key maintenance practices will help you explore your tires’ condition more fully.
The Penny Test: Limitations and Supplemental Use
The ‘Lincoln’s head upside down’ penny test is a long-standing, quick, and informal method to get a rough idea of tread depth. If you insert a penny head-first into a tread groove and Lincoln’s entire head is visible, your tread is likely less than 2/32″, indicating it’s time for new tires. However, its primary limitation is its inherent imprecision. It only tells you if you’re above the 2/32″ minimum, offering no insight into specific depth or uneven wear patterns. It’s a good supplement for a quick sanity check but never a replacement for a dedicated tread gauge.
Integrating Regular Visual Inspection
Beyond depth, routine visual checks are crucial. Discover other signs of tire distress:
- Sidewall Cracks: Small cracks can indicate aging or sun damage.
- Bulges or Bubbles: These are serious structural failures that can lead to sudden blowouts.
- Embedded Foreign Objects: Nails, screws, or sharp debris can cause slow leaks or sudden punctures.
- Irregular Wear: Look for patterns like cupping, feathering, or flat spots that a gauge might not immediately quantify but are visually evident.
This proactive inspection complements your depth measurements, giving you a holistic view of tire health.
The Impact of Proper Tire Pressure and Rotation on Tread Longevity
Maintaining correct tire inflation pressure and adhering to manufacturer-recommended tire rotation schedules are foundational to tire longevity and even wear. Statistics show that many drivers check tire pressure less frequently than recommended (often monthly). However, proper inflation can improve fuel economy by up to 3% and significantly extend tire life by ensuring even contact with the road. Regular tire rotation (e.g., every 5,000-7,500 miles) prevents uneven wear by moving tires to different positions on the vehicle, distributing wear forces more equally.
When to Consult a Professional Tire Technician
While you can do much to monitor your tires, knowing when to seek professional help is key. Consult a certified automotive technician if you encounter:
- Persistent Uneven Wear: If you’ve corrected inflation and rotated tires, but uneven wear persists (e.g., a driver notices one tire consistently wearing faster on its outer edge), it’s time for an alignment check or suspension inspection.
- Consistent Critical Readings: If multiple tires consistently show 4/32″ or less, or if any tire is at 2/32″.
- Visible Tire Damage: Bulges, deep cuts, punctures, or cracking on sidewalls.
- Handling Concerns: Any noticeable changes in vehicle handling, such as pulling, vibration, or reduced stability, could be tire-related.
Professionals have the equipment and expertise to diagnose root causes beyond what a simple gauge can reveal, ensuring comprehensive safety and performance.
Never compromise on safety by delaying tire replacement once tread depth falls below 4/32″, and especially not once it reaches the 2/32″ legal minimum. The performance degradation, particularly in wet conditions, is substantial and can lead to severe accidents. Your vehicle’s only contact with the road is its tires; ensure they are in optimal condition.
Accurate tire tread depth measurement with a dedicated gauge is indispensable for vehicle safety and performance. Mastering the use of a tread gauge involves precise placement, firm application, and taking multiple readings across the tire to detect wear patterns. Correctly interpreting tread depth readings allows for timely identification of wear issues and informed decisions on tire maintenance or replacement. Integrate these routine tire tread depth checks into your vehicle care regimen. Should you detect any abnormal wear patterns or consistently critical tread depth levels, promptly consult a certified automotive technician for a professional assessment and necessary remediation, ensuring your continued safety on the road.
Frequently Asked Questions
How often should I check my tire tread depth?
It is highly recommended to check your tire tread depth at least once a month, or every 5,000 to 10,000 miles, ideally coinciding with routine maintenance like oil changes or tire rotations. Frequent checks are crucial for identifying developing wear trends early, which helps maintain optimal safety, prevents unexpected tire failures, and ensures compliance with legal tread depth requirements for your region.
What is the minimum legal tread depth?
In most jurisdictions, the minimum legal tread depth for passenger vehicle tires is 2/32nds of an inch (approximately 1.6 millimeters). Operating a vehicle with tread shallower than this limit is unlawful and significantly compromises safety, particularly reducing a tire’s ability to displace water, dramatically increasing the risk of hydroplaning and loss of control in wet conditions.
Can I use a coin to measure tread depth?
While the ‘penny test’ (inserting a penny head-first into a tread groove) can offer a very quick, informal indication that your tread is *above* the 2/32-inch legal minimum, it lacks the precision and consistency of a dedicated tire tread gauge. For accurate assessment, early detection of uneven wear, and precise measurement, a proper tread gauge is always recommended over a coin.
What does uneven tire wear indicate?
Uneven tire wear often signals underlying mechanical issues requiring attention. For instance, excessive wear in the center of the tread usually points to consistent overinflation, while wear on both outer edges often suggests underinflation. Wear concentrated on only one side (inner or outer) typically indicates a wheel alignment problem or worn suspension components. Early detection helps prevent further damage.
Should I replace my tires at 4/32″ or wait until 2/32″?
While 2/32″ is generally the legal minimum, many tire experts and safety organizations strongly recommend considering tire replacement when tread depth reaches 4/32nds of an inch (approximately 3.2 millimeters), especially if you frequently drive in wet conditions. Beyond this depth, a tire’s ability to effectively channel water and maintain critical traction significantly diminishes, increasing hydroplaning risk and overall braking distances.