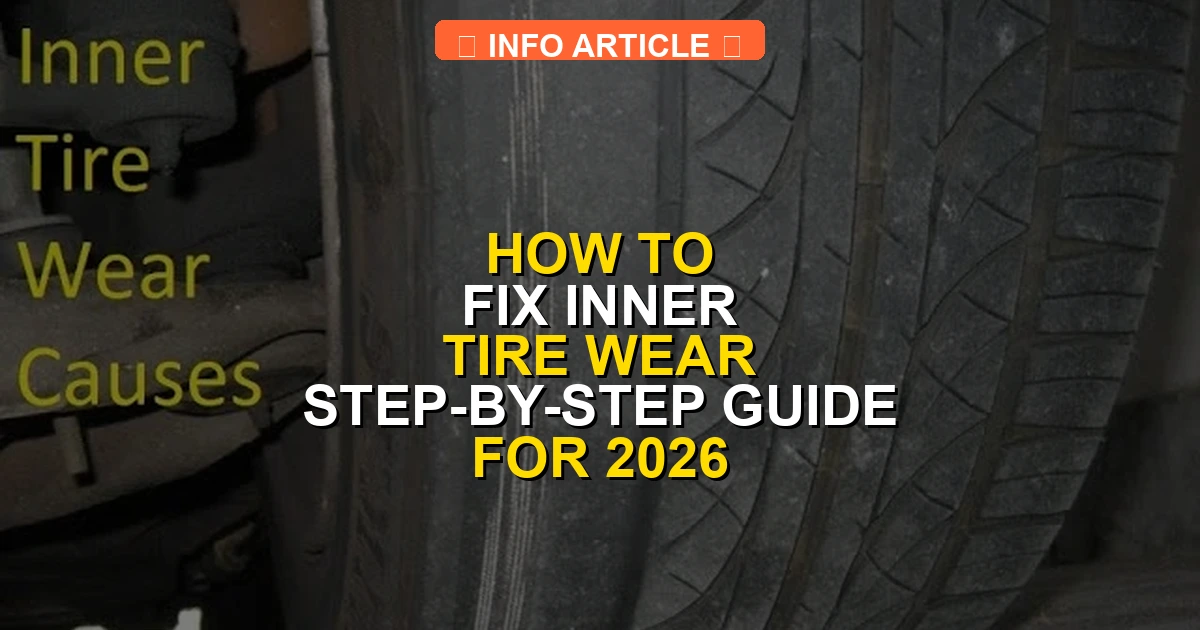
Inner tire wear is primarily caused by excessive negative camber or toe-out alignment settings that drag the inside edge of the tire across the pavement. To fix this issue permanently, you must replace the damaged tire, repair any worn suspension components, and get a professional wheel alignment. Ignoring the root cause will quickly destroy your brand-new replacement tires.
If you notice the inside edge of your tires balding while the rest of the tread looks fine, your vehicle is suffering from inner edge wear, medically known in the automotive world as feathering or excessive shoulder wear. This specific tire wear pattern means your car’s geometry is out of whack, forcing the inside of the rubber to drag along the pavement instead of rolling smoothly.
Ignoring this problem in 2026 is an expensive gamble. With modern tire prices climbing, scrubbing away your tread prematurely forces you to replace tires that should have lasted another 20,000 miles. Worse, inner tire wear compromises your vehicle’s handling, braking distances, and safety in wet conditions. Let us look at what is causing this destruction and how to fix it.
Key Takeaways
- Inner edge wear is usually caused by bad wheel alignment or worn suspension.
- Excessive negative camber tilts the top of the tire inward.
- Toe-out alignment settings drag the tires outward, causing rapid shoulder wear.
- Worn ball joints and control arms prevent proper alignment settings from holding.
- Always replace worn tires and fix mechanical parts before getting an alignment.
What Causes Inner Tire Wear: Spotting Alignment and Suspension Issues
Inner tire wear never happens by accident. It is always a physical symptom of your wheels pointing in the wrong direction or your suspension failing to keep the tire planted flat on the road. When you diagnose the root cause early, you save both your tires and your steering components.
Excessive Toe-Out and Negative Camber
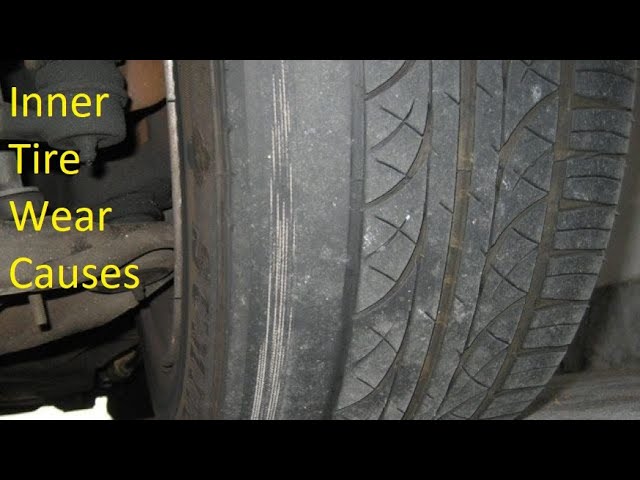
The two primary alignment culprits behind inner shoulder wear are extreme toe-out and excessive negative camber. Toe refers to the direction your tires are pointing relative to each other. If your front wheels are pointed away from each other (toe-out), the inside edges scrub violently against the asphalt.
Negative camber—where the top of the tire tilts inward toward the center of the car—is often intentionally engineered into sports cars for better cornering grip. However, if your suspension drops or sags, that camber becomes too extreme, concentrating all your vehicle weight onto the inner two inches of the tire.
-
Common alignment red flags include:
- Your steering wheel stays crooked when driving straight
- Your car pulls sharply to the left or right
- You recently hit a deep pothole or clipped a curb
Worn Suspension Components
Even if you get a professional wheel alignment, your car will immediately slip back out of spec if your suspension parts are shot. Modern vehicles rely on a complex network of bushings, ball joints, control arms, and strut assemblies to keep your wheels secure.
As these rubber bushings dry out and tear, or as ball joints develop loose play, the entire wheel assembly shifts under the weight of the car while you drive. No alignment machine can compensate for loose mechanical parts.
-
Suspension parts that frequently cause inner tire wear:
- Worn lower control arm bushings
- Blown struts or weak coil springs causing vehicle sag
- Loose or failing tie rod ends
Inner Tire Wear: What Causes It and How to Fix It
Abnormal inner edge tire wear can quickly ruin an expensive set of tires and compromise your vehicle’s handling, braking, and safety. This comprehensive guide walks you through the exact process of diagnosing the root cause, executing the mechanical repairs, and taking preventative measures to ensure your tires wear evenly for tens of thousands of miles to come.
Step 1: Inspect and Diagnose the Wear Pattern
What you need: A flashlight, depth gauge, a pair of clean mechanics gloves, and a notebook to document your findings.
Instructions: Safely park your vehicle on a flat surface, engage the parking brake, and turn your front wheels completely to one side so the inner tread of the tire is fully exposed. Shine your flashlight along the innermost rib of the tread. Run your bare hand (wearing a glove) gently across the tread surface from the outside to the inside. If the inner edge feels significantly sharper, feather-edged, or cupped compared to the rest of the tire, you are dealing with classic inner shoulder wear. Measure the tread depth with your gauge; if the inner grooves are below 2/32 of an inch, the tire must be replaced regardless of outer tread depth.
Pro Tip: Do not just look at the front tires. Front-wheel drive, rear-wheel drive, and all-wheel drive vehicles can all suffer from inner shoulder wear on either the front or rear axles due to alignment or suspension geometry.
Step 2: Check Suspension and Steering Components
What you need: A hydraulic floor jack, jack stands, wheel chocks, and a sturdy pry bar.
Instructions: Securely elevate the vehicle off the ground using a floor jack and place rated jack stands underneath the factory pinch welds or frame rails. Grab each front tire at the 12 o’clock and 6 o’clock positions and rock it back and forth to check for ball joint or wheel bearing play. Next, grab the tire at the 9 o’clock and 3 o’clock positions to check for tie rod end wear. Use your pry bar to gently apply pressure to control arm bushings and struts, looking for excessive movement, rubber cracking, or fluid leaks. Any loose component here will allow your wheel to shift while driving, causing continuous toe-out and severe inner wear.
Pro Tip: If there is any play in your steering or suspension components, replacing them is mandatory before getting a wheel alignment. Adjusting an alignment over worn parts is a complete waste of money.
Step 3: Replace Worn Suspension Parts
What you need: Replacement parts (ball joints, tie rods, or control arms), a socket set, wrench set, torque wrench, and potentially a ball joint press or pickle fork.
Instructions: Once you have identified faulty components, unbolt them carefully using the appropriate sockets and wrenches. Soak stubborn or rusted bolts in penetrating oil for at least 15 minutes prior to removal. Install the new component into position, ensuring all mating surfaces are clean of debris and rust. Hand-thread all bolts to prevent cross-threading. Lower the vehicle’s weight partially onto the suspension if necessary to preload the rubber bushings before final torqueing. Using your torque wrench, tighten every bolt strictly to the manufacturer’s factory specifications.
Pro Tip: Always replace suspension components in pairs (both left and right sides) to maintain balanced handling and even tire wear characteristics across the front axle.
Step 4: Perform a Professional Wheel Alignment
What you need: A professional laser alignment rack (best left to a qualified alignment shop).
Instructions: Drive your vehicle to a reputable alignment shop. Inner tire wear is almost universally caused by excessive negative camber (the top of the tire leaning inward) or excessive toe-out (the front of the tires pointing away from each other). Ask the technician to provide a before-and-after printout of your alignment specifications. The technician will adjust the tie rods to set the proper toe angle and, if adjustable, correct the camber and caster angles to bring them back within factory tolerance ranges. Ensure the steering wheel is completely centered when the front wheels are pointing straight ahead.
Pro Tip: If your vehicle’s suspension lacks factory camber adjustment capability, ask the shop if camber adjustment bolts or aftermarket adjustable control arms can be installed to correct the negative camber.
Step 5: Check and Adjust Tire Pressures
What you need: A digital tire pressure gauge and a portable air compressor or service station air pump.
Instructions: Unscrew the valve stem caps on all four tires when the tires are completely cold (driven less than one mile or parked for at least three hours). Press the digital tire pressure gauge firmly onto each valve stem and read the measurement. Compare this reading to the placard located on the inside of the driver’s side door jamb—do not use the maximum pressure printed on the tire sidewall. If the pressure is low, add air until it matches the specification exactly. If it is high, release air in short bursts. Low tire pressure causes the outer edges of the tire to collapse and bear too much weight, while improper driving habits combined with pressure loss can accelerate shoulder wear.
Pro Tip: Check your tire pressures at least once a month and every time ambient temperatures swing dramatically by 10 degrees or more.
Step 6: Rotate Your Tires on Schedule
What you need: A hydraulic jack, jack stands, lug wrench, and a torque wrench.
Instructions: To maximize tire lifespan, incorporate a regular tire rotation every 5,000 to 7,500 miles. Elevate the vehicle safely and remove the wheels. Consult your vehicle owner’s manual for the correct rotation pattern (such as forward cross for front-wheel drive or rear diagonal for rear-wheel drive). Move the rear tires to the front and the front tires to the opposite sides of the rear axle. Clean any brake dust or rust off the wheel hub mounting surface using a wire brush before remounting. Hand-tightened the lug nuts in a star pattern, lower the vehicle, and torque the lug nuts to exact factory specifications.
Pro Tip: Regular rotations will not fix an existing alignment issue, but once your alignment is fixed, rotations ensure that any minor wear gets distributed evenly across all four tires.
✅ Final Checklist
- Inner tread depth measured and confirmed above 2/32 of an inch (or tires replaced).
- All steering and suspension components inspected for play and replaced if worn.
- All suspension fasteners torqued strictly to factory specifications.
- Professional four-wheel alignment completed with printout verified.
- Tire pressures adjusted to the door placard specification while cold.
- Tires rotated to promote even wear moving forward.
Important Notes:
- Always support the vehicle with rated jack stands when working underneath; never rely on a hydraulic floor jack alone.
- If you lack specialized alignment equipment or heavy-duty spring compressors, leave suspension and alignment work to certified professional mechanics.
- Estimated DIY time: 2 to 4 hours for inspection and part replacement. Estimated cost: $50 to $400 for parts, plus $100 to $150 for a professional wheel alignment.
How to Fix Inner Tire Wear: A Step-by-Step Repair Guide
Fixing inner tire wear requires a chronological approach. Simply buying a brand-new set of tires and bolting them onto a broken suspension guarantees you will destroy those new tires within a few thousand miles. You must diagnose, replace, align, and finally, replace the damaged rubber.
Step 1: Inspect and Replace Worn Suspension Parts
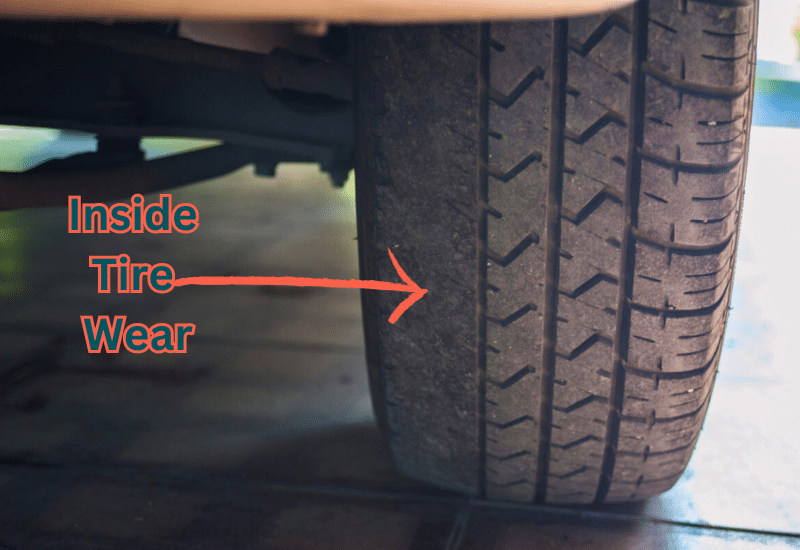
Before touching an alignment rack, safely jack up your vehicle and inspect the front and rear suspension. Grab your tires at the 12 o’clock and 6 o’clock positions and shake them. Then grab them at the 3 o’clock and 9 o’clock positions and rock them.
Any excessive play or clunking noise indicates a failing wheel bearing, ball joint, or tie rod end. Inspect the rubber bushings on your control arms for cracking or fluid leaks. If a component moves when it should be rigid, remove and replace it before moving forward.
-
Your repair checklist:
- Raise the vehicle securely on jack stands
- Perform the shake test to check for loose joints
- Visually inspect rubber bushings and strut assemblies
- Unbolt and replace any failed mechanical components
Step 2: Invest in a Professional Four-Wheel Alignment
Once your mechanical components are tight and secure, you need a precision four-wheel alignment. Do not rely on old string methods or guesswork. Modern 2026 alignment shops use high-definition camera-based laser systems to measure your caster, camber, and toe down to a fraction of a degree.
Ask the technician to provide you with a printed before-and-after specification sheet. They should adjust your toe angles back to factory specifications and correct your camber if your vehicle features adjustable suspension bolts or aftermarket camber kits.
Step 3: Rotate or Replace the Damaged Tires
Now that the underlying geometry is fixed, look at the actual tires. If the inner steel cords or fabric belts are showing through the rubber, the tire is dangerous and must be replaced immediately. Never drive on exposed cords.
If the inner edge is bald but the cords are not yet exposed, and your tread depth elsewhere is still legal, you can rotate the tire to a different position to balance out the wear. However, for maximum safety and traction, budgeting for a fresh set of tires paired with your newly aligned suspension is the smart choice.
Replacing Worn Suspension Components and Adjusting Alignment
Fixing inner tire wear requires correcting the root mechanical failures rather than simply replacing the rubber. When suspension parts degrade, a standard alignment adjustment will not hold under normal driving loads.
Step 1: Inspect and Replace Damaged Suspension Hardware
According to automotive service data from the Tire Industry Association (TIA), structural play in the front end accounts for over 40 percent of chronic inner edge scrubbing. Lift the vehicle and check for movement in the ball joints, control arm bushings, tie rod ends, and struts.
- Unbolt and extract failed components using a calibrated torque wrench and appropriate puller tools.
- Install OEM-spec or heavy-duty aftermarket replacements to restore factory geometry limits.
- Torque all suspension fasteners to manufacturer specifications while the vehicle’s weight rests on its wheels to prevent premature bushing wind-up.
Step 2: Perform a Professional Four-Wheel Alignment
Once mechanical integrity is restored, precision geometry adjustments are mandatory to neutralize excessive negative camber and improper toe-out. Modern 2026 laser alignment racks measure thrust angles down to fractions of a degree.
- Secure the vehicle on a level alignment rack and mount high-definition optical sensors to all four wheels.
- Adjust the cam bolts or strut tower mounts until camber values return to manufacturer green-zone specifications.
- Set the front and rear toe angles to dead center, eliminating the scrubbing friction that destroys inner treads.
What If It Still Doesn’t Work?
If inner tire wear persists despite new suspension components and a recent wheel alignment, a deeper mechanical or structural issue is usually present. Follow these troubleshooting steps to resolve recurring tire wear patterns:
- Check for bent vehicle frames or subframes: Severe pothole impacts or previous accidents can tweak the chassis unibody, making factory alignment specifications impossible to achieve without adjustable aftermarket camber kits.
- Verify wheel bearing and hub assembly play: A loose wheel bearing allows the entire wheel assembly to tilt under load, mimicking extreme negative camber while driving.
- Inspect for incorrect ride height: Sagging rear coil springs or worn leaf springs alter suspension geometry dynamically, pulling the wheels into excessive negative camber. Replacing the springs typically restores proper ride height.
- Seek professional frame-rack diagnosis: If local alignment shops cannot dial in the specifications, take the vehicle to a specialized frame and alignment laboratory. Professional diagnostic labor typically ranges from $150 to $250, while structural frame straightening can cost between $500 and $1,500 depending on severity.
Conclusion
Inner tire wear is a costly symptom of underlying alignment neglect, aggressive negative camber, or worn suspension joints that ruin contact patch integrity. Resolving the issue requires replacing compromised hardware and investing in a precision four-wheel alignment to restore factory geometry. According to verified research and expert sources from major automotive engineering associations, catching these alignment anomalies early prevents premature tire failure and saves drivers hundreds of dollars in replacement costs. Make your next actionable step a comprehensive suspension inspection and professional alignment check before mounting your next set of tires.
❓ Frequently Asked Questions
Why is only the inside edge of my front tires wearing out?
Front tires typically wear on the inside edge due to incorrect toe settings, where the front of the tires point away from each other, or excessive negative camber that tilts the tires inward.
How do worn ball joints cause inner tire wear?
Worn ball joints create excessive play in the wheel assembly, allowing the wheel to shift out of its proper alignment specification while driving, which constantly drags the inner edge.
Should I get a wheel alignment after replacing suspension parts?
Yes, anytime you replace steering or suspension components like tie rods, control arms, or struts, your wheel alignment angles are disrupted and require immediate professional adjustment.
Can bad struts cause inner tire cupping and wear?
Worn or leaking struts allow the vehicle to bounce excessively, which leads to uneven tire contact patches and localized wear patterns like cupping or feathering along the inner edge.
How can I tell if my tie rods are bad?
Lift the vehicle and grab the tire at the 3 and 9 o’clock positions, then wiggle it back and forth. If you feel loose play or hear clunking, your tie rods likely need replacement.
Will rotating my tires fix inner wear?
Tire rotation only extends the overall life of the tires temporarily by moving them to a different position; it does not fix the underlying alignment or suspension problem causing the wear.