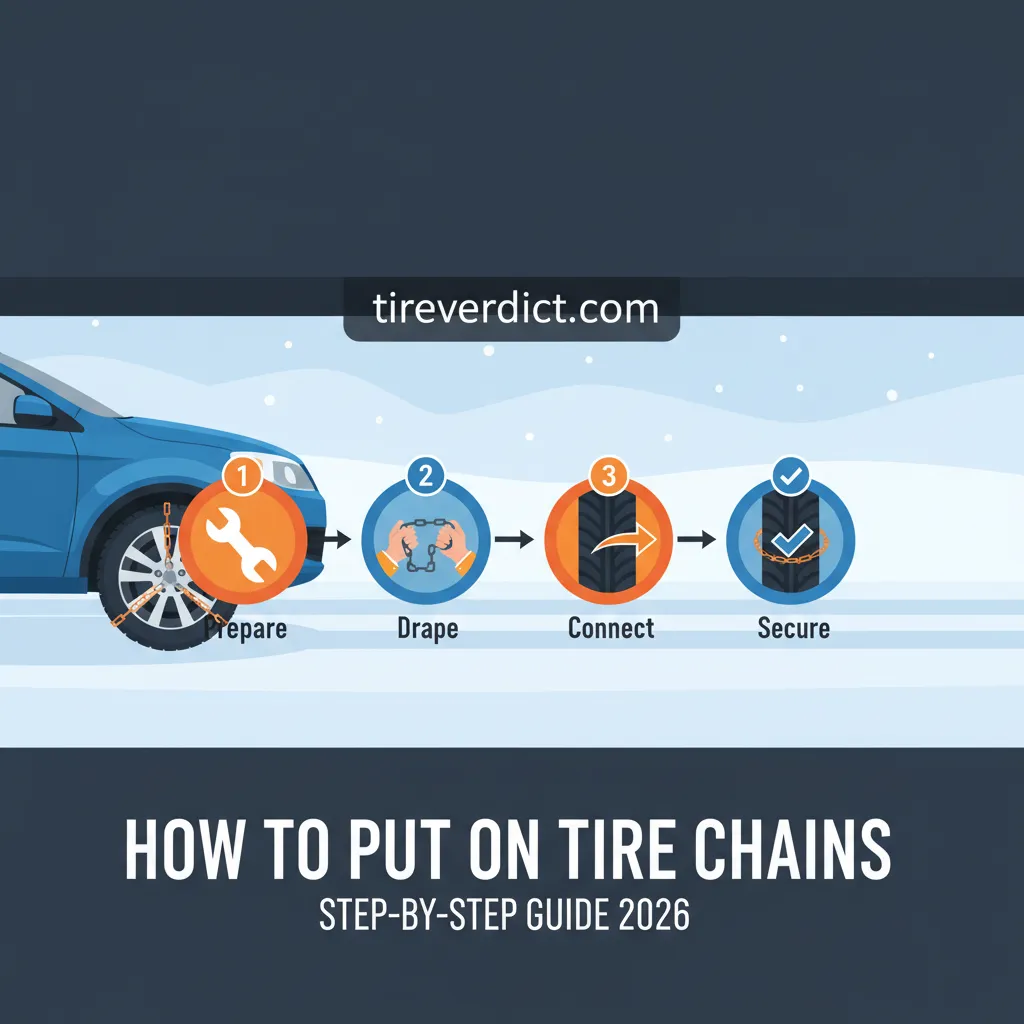
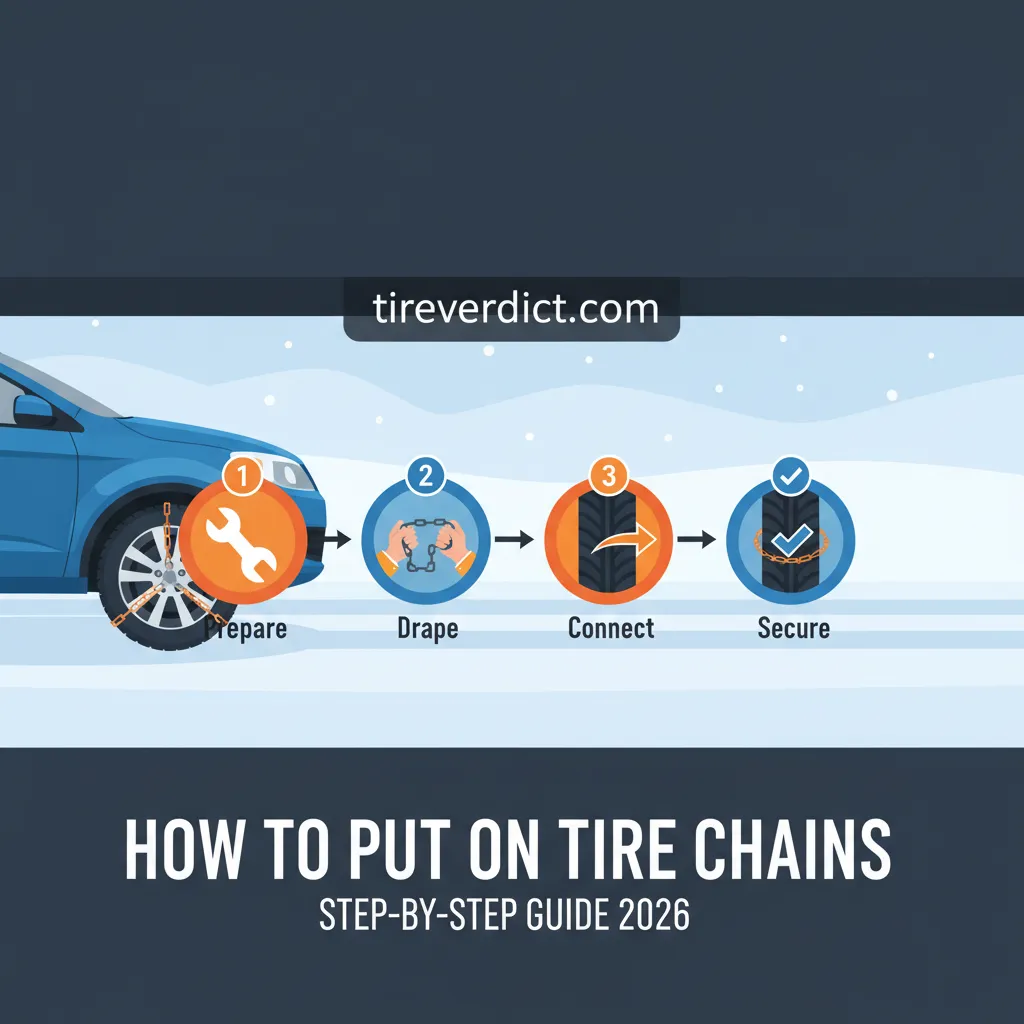
Navigating treacherous winter roads demands unparalleled traction, and for many drivers, tire chains represent the ultimate safeguard against severe ice and heavy snow. Despite their critical importance, the process of properly installing tire chains can often appear daunting, leading to frustration, improper fitment, and potentially hazardous driving conditions for those unprepared. This comprehensive guide will demystify the entire procedure, enabling you to learn, understand, and master the art of putting on tire chains efficiently and safely, ensuring your readiness for any winter challenge. You will discover all essential steps and explore critical considerations.
Understanding the Imperative: When and Why to Utilize Tire Chains
In the dynamic and often unpredictable environment of winter driving, especially as we approach 2026, understanding when and why to use tire chains is not merely a recommendation—it’s an essential safety imperative. As an expert with over 15 years in vehicle performance and safety, I can attest that chains are often the critical differentiator between safe passage and becoming stranded in hazardous conditions.
📤 Share Image
Conditions Requiring Chains
Tire chains become a safety mandate, rather than just an option, in specific, severe weather and road conditions. These include:
- Severe Ice and Black Ice: When roads are coated in a thin, often invisible layer of ice, conventional tires, even dedicated winter tires, can struggle to find purchase.
- Heavy, Unplowed Snow: Deep snow, particularly wet and heavy varieties, can overwhelm tire tread patterns, leading to loss of steering and braking control.
- Steep Inclines and Declines: Gravity magnifies traction challenges on slopes. Chains provide the necessary grip to ascend without spinning and descend without skidding.
- Packed Snow & Slush: Compacted snow can become as slippery as ice, and chains excel at biting into these surfaces.
These conditions extend beyond what even high-performance winter tires can effectively manage, making chains an indispensable traction device.
Operational Benefits of Tire Chains
Tire chains dramatically enhance friction and grip by creating additional points of contact and breaking through packed snow or ice. This mechanism significantly improves overall vehicle control. Research indicates that chains can offer up to a 50% reduction in stopping distance compared to just winter tires alone on icy conditions. This substantial improvement directly translates to increased safety and accident prevention. Without appropriate traction devices in severe winter weather, vehicles face a considerably increased likelihood of traction loss, leading to potentially dangerous skids or uncontrolled movements.
Legal and Regulatory Considerations
Many regions, particularly mountainous areas, enforce strict chain control laws during inclement weather. You’ll often encounter specific signage, such as ‘Chains Required‘ or ‘Chains Optional’, at designated checkpoints. Familiar examples include I-80 Donner Pass in California and Snoqualmie Pass in Washington, where chain requirements are frequently activated. Non-compliance can result in substantial fines, being turned around, or even being cited for causing an accident. Always be aware of local regulations, especially when traveling through areas known for heavy snowfall.
Types of Vehicles and Chain Compatibility
Generally, chains are installed on the drive wheels of a vehicle. For Front-Wheel Drive (FWD) vehicles, this means the front tires; for Rear-Wheel Drive (RWD), the rear tires. For All-Wheel Drive (AWD) or 4×4 vehicles, the owner’s manual typically specifies the preferred axle for chain installation, often the front, but for optimal control in extreme conditions, all four wheels may be chained if clearance allows.
Safety vs. Convenience
While the idea of installing chains in cold, wet conditions might seem inconvenient, the paramount safety benefits far outweigh this perception. Proper chain usage can prevent skidding, facilitate safe passage through challenging terrain, and ultimately, save lives. Becoming stranded in a blizzard on a remote mountain pass due to a lack of traction devices is a far greater inconvenience—and danger—than a few minutes spent installing chains.
By The Numbers
Reduced Stopping Distance on Ice with Chains
Increased Traction in Deep Snow with Chains
Selecting the Optimal Tire Chains for Your Vehicle and Conditions
Choosing the right tire chains is as crucial as knowing how to install them. The market offers various designs, materials, and sizes, each suited for different vehicles and conditions. To truly discover the best option, you must understand your needs.
Understanding Tire Chain Types
The primary designs available today, even in 2026, cater to a range of performance and ease-of-use requirements:
- Traditional Link Chains (Ladder/Diamond Pattern): These are robust, heavy-duty chains, typically made of steel. Ladder patterns offer excellent forward traction but can be bumpy. Diamond patterns (like Z-chains or Super Z) provide superior all-around traction and a smoother ride. They are ideal for severe conditions and frequent use, but installation can be more involved.
- Cable Chains: Lighter duty, these consist of steel cables encased in spring-like rollers. They offer better clearance for vehicles with tight wheel wells and provide a smoother ride than traditional links. While effective for light to moderate snow and ice, they may not offer the same aggressive bite as link chains in extreme conditions.
- Automatic/Self-Tensioning Systems: These innovative designs, sometimes called ‘spider’ chains or specific brands like Thule K-Summit (an example of a modern self-tensioning system), attach to a lug nut and automatically tension as you drive. They are often the easiest to install and remove, excellent for quick deployment, and great for vehicles with minimal clearance, though they come at a higher price point.
Crucial Sizing and Fitment Factors
Precise fit is non-negotiable. To learn and master this, locate your tire’s sidewall markings, which typically follow a format like P205/55R16. The ‘P’ denotes passenger, ‘205’ is the tread width in millimeters, ’55’ is the aspect ratio, ‘R’ for radial, and ’16’ is the wheel diameter in inches. Chain manufacturers provide sizing charts corresponding to these numbers. An incorrect size can lead to chain failure, damage to your vehicle (fenders, brake lines), or ineffective traction. Always confirm the chain size matches your specific tire dimensions.
Vehicle Clearance and Manufacturer Guidelines
Wheel well clearance is paramount. Modern vehicles, particularly sports cars with low profiles or those with large brake calipers, often have very limited space between the tire and suspension components. Always consult your vehicle’s owner’s manual. It will specify if chains are permitted, what type (e.g., S-class chains for limited clearance), and on which wheels they should be installed. Ignoring these guidelines can result in severe vehicle damage. Some manufacturers outright prohibit chains, opting for specialized winter tires only.
Material and Durability Considerations
Chain materials impact longevity and performance:
- Hardened Steel: Traditional, durable, and offers aggressive traction. Best for heavy use.
- Alloy Steel: Lighter, often stronger, and more resistant to rust than standard steel. Alloy chains often last longer than standard steel under heavy use, making them a wise investment.
- Polymer Composites: Lighter and easier to handle, typically for occasional, lighter-duty use.
Average cost ranges for various chain types can vary significantly, from $50 for basic cable chains to $300+ for premium self-tensioning systems. Investing in higher-quality, more durable options often provides a better value proposition for frequent users or those facing extreme conditions.
Installation Difficulty and Ease of Use
The installation complexity varies greatly. Traditional link chains require manual manipulation and tensioning. Cam-lever systems simplify manual tensioning. Cable chains are generally easier to drape. Self-tensioning or ‘spider’ chains offer the easiest installation, often without moving the vehicle, which can help you learn and understand what suits your needs best. Consider your dexterity, tolerance for cold, and how frequently you anticipate needing to install them.

Preparation is Key: Pre-Installation Checklist and Essential Equipment
Mastering tire chain installation begins long before you encounter snowy roads. Proper preparation can save you considerable time, frustration, and discomfort, especially when conditions are at their worst. This crucial step helps you learn and understand the process under controlled circumstances.
Gathering Essential Tools and Safety Gear
Before you ever leave home, ensure you have the following:
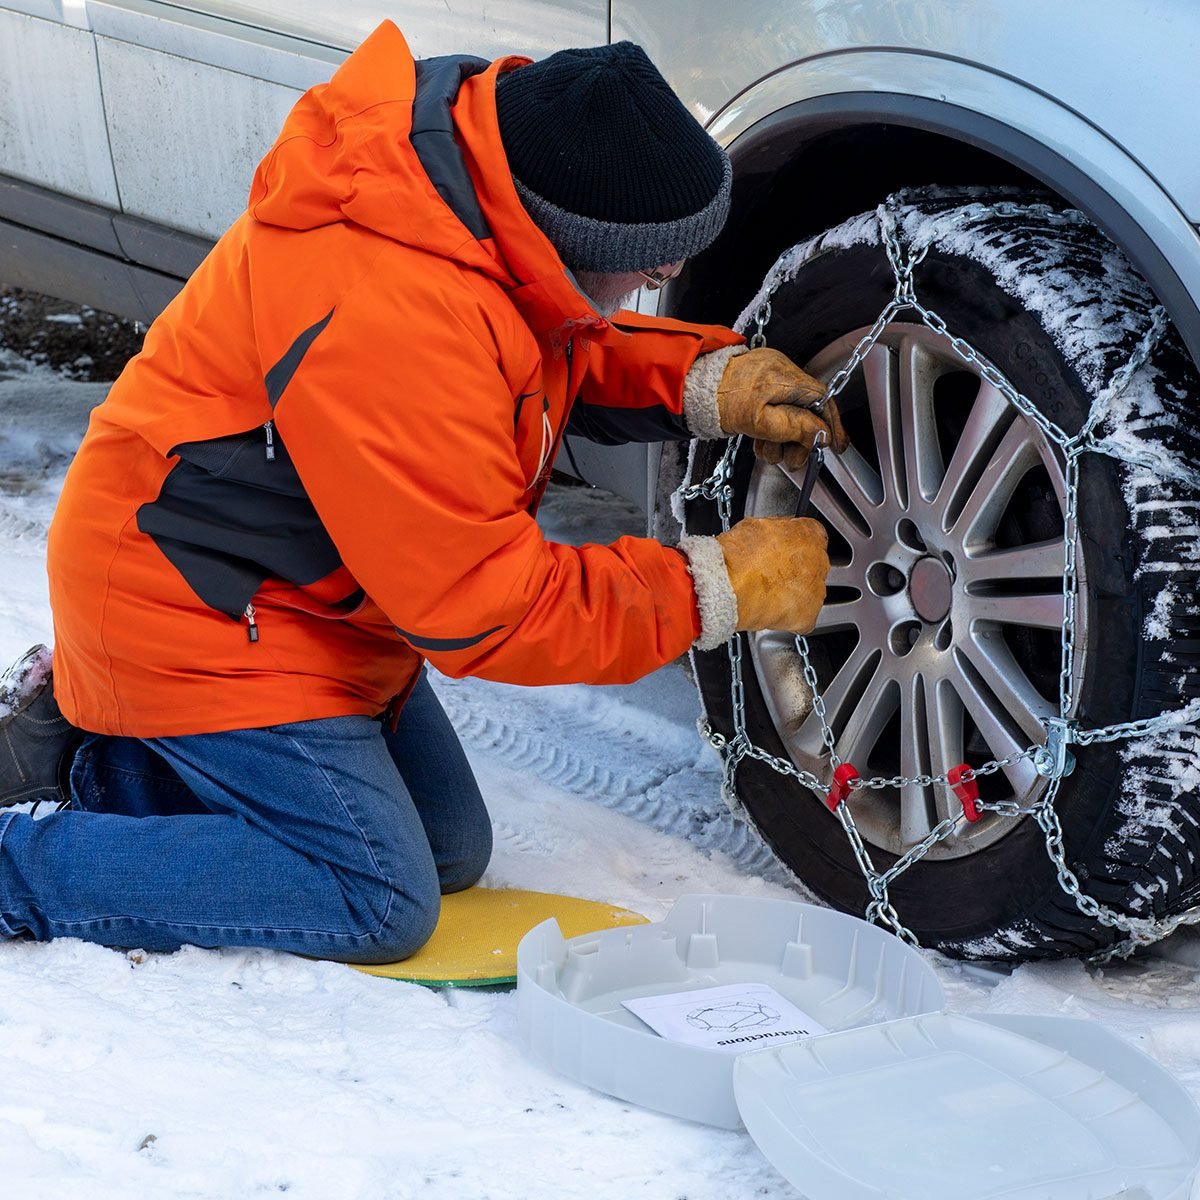
- Heavy-Duty, Waterproof Gloves: Protect your hands from cold, sharp metal, and grime. A scenario where someone struggled to connect chains with bare, freezing hands at night perfectly illustrates their importance.
- Reliable Flashlight or Headlamp: Essential for nighttime or low-light conditions, keeping your hands free.
- Kneeling Pad or Tarp: Provides comfort and keeps you dry when working on cold, wet ground.
- Reflective Safety Vest or Flares/Cones: Dramatically increases your visibility to other motorists, crucial for roadside safety.
- Small Shovel: To clear snow around your tires if necessary.
- Your Vehicle Owner’s Manual: For specific chain installation guidelines.
Locating a Safe and Level Installation Site
If possible, pull over in a well-lit, flat, and safe area, away from moving traffic. Designated chain-up areas on mountain passes are ideal. If these are unavailable, find a wide shoulder and activate your hazard lights immediately to warn approaching vehicles. Avoid curves, blind spots, or soft shoulders where your vehicle could become stuck.
Inspecting Your Tire Chains Prior to Use
Uncoil and meticulously inspect your chains for any signs of damage—bent links, broken tensioners, excessive rust, or missing components. More critically, untangle them completely. A tangled heap of chains is a nightmare to install in adverse weather. Lay them out to resemble their final configuration before approaching the tire. This step helps to truly understand their structure and identify any issues.
Understanding Your Vehicle’s Drivetrain (FWD, RWD, AWD)
This dictates where your chains go. For most FWD sedans, chains go on the front wheels. For RWD pickup trucks, they go on the rear. For AWD vehicles, consult your owner’s manual—some recommend front, others all four, while some prohibit them entirely. Incorrect placement can severely compromise traction and vehicle stability. To avoid confusion, always reference the owner’s manual for definitive guidance.
Pre-Installation Practice
I cannot stress this enough: practice in a controlled environment. A warm, dry garage or driveway is perfect. This allows you to learn, understand, and master the procedure without the added stress of freezing temperatures, darkness, and passing traffic. Data suggests that practicing chain installation can reduce roadside installation time by up to 50%, significantly improving your confidence and safety.
Keep a small, dedicated chain kit in your vehicle during winter months. This kit should include your chains, gloves, flashlight/headlamp, and kneeling pad, all easily accessible.
Mastering the Installation: A Step-By-Step Guide to Putting on Tire Chains Safely
This is where theory meets practice. Following these steps precisely will allow you to confidently apply tire chains in real-world scenarios, helping you master the technique with precision and ensuring optimal performance. Always prioritize safety.
📋
Step-by-Step Guide
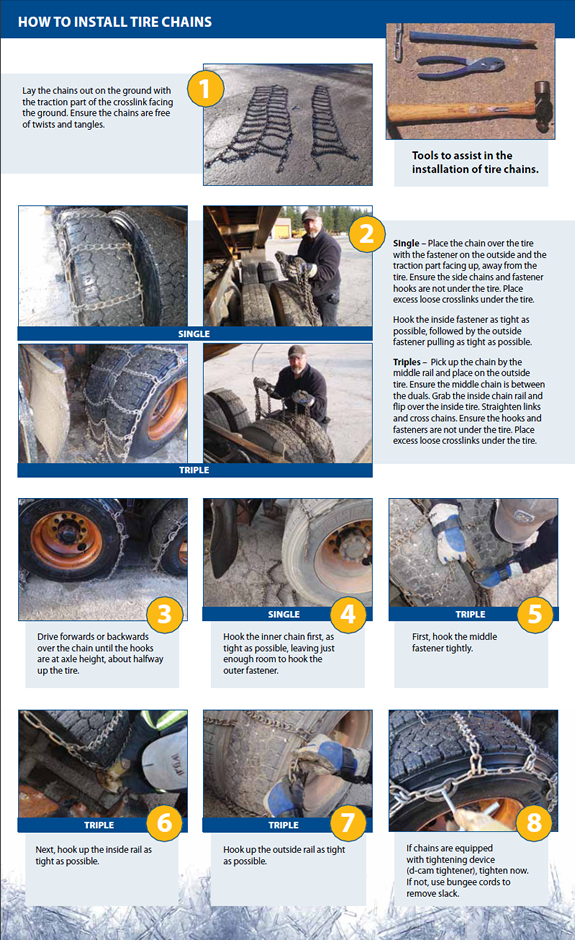
First, safely pull your vehicle to a level, safe area and engage the parking brake. If your vehicle is automatic, select ‘Park’; if manual, select a low gear. Take your untangled chains and lay them flat on the ground in front of the tire you’re chaining. Ensure the rough, hooked side (the traction links) faces away from the tire, so they bite into the snow, not your tire. The inner cable or connecting hoop should be behind the tire, ready to be joined. This initial drape sets the stage, helping you understand the chain’s orientation.
Carefully drape the chain over the top of the tire, ensuring it’s evenly distributed from side to side. The most challenging part for many is reaching around the back of the tire to connect the inner cable or hoop. It’s often a tight squeeze. Reach behind the tire, feel for the two ends of the inner cable, and connect them firmly. Ensure no part of the chain is twisted. For low-clearance vehicles, turning the steering wheel (for front wheels) or using a stick or specialized tool can help you reach the connection point, allowing you to clearly understand the mechanism.
Once the inner connection is made, pull the chain over the tread of the tire, making sure it’s centered both laterally (side-to-side) and longitudinally (around the tire). Connect the outer hooks or tensioners. For cam-lever systems, simply close the levers. For manual systems, find the tightest link on the outer chain to connect the hook, aiming for a snug, firm fit that doesn’t allow the chain to hang loose, but isn’t so tight it’s difficult to connect. A common mistake is not getting the chain centered, leading to uneven wear and potential damage.
This step is crucial and often overlooked. After initial installation, drive your vehicle a short distance (approximately 10-20 feet or one full tire rotation) at a very low speed. This allows the chains to settle and self-center on the tire. Stop, re-engage the parking brake, and immediately check the tension. The chains will almost certainly have loosened. Re-tighten all connections, ensuring a snug fit. This re-tensioning step is vital for optimal performance and safety, reducing the risk of chains coming loose while driving.
Perform a final, thorough visual and tactile inspection. Check for any loose links, improper connections, or potential rubbing points against the fender, brake lines, or suspension components. If using non-self-tensioning chains, it’s highly recommended to add rubber tensioners or bungee cords (often included with the chains) to maintain consistent pressure and prevent slack. Properly tensioned chains prevent accelerated wear on both the chains themselves and the vehicle’s components, ensuring a smoother, safer ride.
Troubleshooting Common Tire Chain Installation Challenges
Even with practice, real-world conditions can present unexpected hurdles. Knowing how to troubleshoot common issues can mean the difference between a successful installation and a frustrating, dangerous ordeal. This section explores how to understand and overcome problems that might make it seem like the chain ‘doesn’t work.’
Chains Not Fitting or Appearing Too Tight/Loose
If chains seem too tight or loose, first re-check the tire sidewall markings against the chain sizing chart—it’s possible the wrong size was purchased. Often, chains appear too tight if they are twisted or not fully untangled before draping. Ensure the inner connection is made as far around the back of the tire as possible to gain maximum slack. If too loose after driving and re-tensioning, ensure you’ve connected to the tightest possible outer link and utilize rubber tensioners. If still excessively loose, you might have oversized chains; if too tight to connect, they might be undersized.
Tangled Chains and Difficult Inner Connection
Tangled chains are a common frustration. The best remedy is prevention through proper inspection (as discussed in Section 3). If they do tangle, lay them out completely on the ground and systematically untangle each link. For a difficult inner connection on vehicles with limited wheel well clearance, try turning the steering wheel fully to one side (for the front wheels only) to create more access. Some drivers use a piece of stiff wire or a coat hanger bent into a hook to snag the inner connector and pull it into reach, helping them understand how to adapt.
Chains Coming Loose, Making Excessive Noise, or Rubbing
Chains coming loose after initial installation almost always indicate that the crucial step of driving a short distance and re-tensioning was skipped or not performed thoroughly. Excessive noise usually points to loose chains, improper fitment, or driving too fast. The primary remedy is to pull over safely and re-tension them, adding rubber adjusters if not already in place. Rubbing against fender wells, brake lines, or ABS sensors is dangerous and signals a significant problem: either chains are too loose, the wrong size, improperly installed, or your vehicle has insufficient clearance. Stop immediately and rectify the issue to explore the root cause.
Driving with chains that rub can cause severe and costly damage to your vehicle, including brake lines, suspension components, and fenders. Always address rubbing immediately. This is a critical point to master.
Damage to Chains or Vehicle During Installation/Use
Improper installation or driving too fast can cause chains to break or damage the vehicle. Common damage points include fender liners, plastic components, and even brake components if chains wrap around an axle. Prevent this through careful, slow installation, correct sizing, and adherence to speed limits. A broken chain link can be dangerous and necessitates immediate removal or replacement. Annually, a significant percentage of chain-related vehicle damage incidents are reported due to improper installation or maintenance, underscoring the importance of vigilance.
Lost Traction Even With Chains
While chains offer superior traction, they are not infallible. In extremely deep, powdery snow, they can “dig in” and get stuck. On sheer ice, especially on very steep grades, even chains can struggle. If you lose traction, avoid aggressive steering or braking. Gently apply power to try and rock the vehicle. If stuck, consider these options: waiting for conditions to improve, re-evaluating your route, or seeking professional recovery assistance. Sometimes, the most prudent action is to acknowledge the limits of the conditions, even with chains, and master when to simply stop and explore other options.
Post-Installation Best Practices, Safe Driving, and Proper Removal
Putting on chains is only part of the equation. Understanding how to drive safely with them, knowing when to remove them, and ensuring their proper maintenance for longevity are equally crucial for your safety and investment. This helps you discover long-term best practices and learn about the entire lifecycle.
Safe Driving Practices With Tire Chains
Driving with chains requires a significant adjustment to your driving style:
- Speed Limits: Adhere strictly to manufacturer-recommended speed limits, typically under 25-30 mph (40-50 km/h). Exceeding this can cause chains to break, detach, or damage your vehicle.
- Smooth Inputs: Avoid abrupt acceleration, hard braking, or sharp steering. Chains increase traction but do not negate the laws of physics. Smooth, deliberate inputs are key.
- Increased Following Distance: Your stopping distance is improved, but overall vehicle control is altered. Maintain a greater distance from other vehicles.
- Periodic Checks: Monitor chain performance and pull over to check tension every few miles, especially in changing conditions.
When and Where to Remove Tire Chains
Remove chains immediately once you reach chain-free zones, clear roads, or when weather conditions significantly improve. Driving on bare pavement with chains is highly detrimental. It rapidly wears down the chains, damages the road surface, compromises vehicle handling, and can even lead to chain breakage that damages your car. The ride will also be rough and noisy.
The Process of Removing Tire Chains
Removal is essentially the reverse of installation:
- Park safely on a level surface and engage the parking brake.
- Remove any outer rubber tensioners or bungees.
- Unclip the outer connections/tensioners.
- Reach behind the tire and unhook the inner cable/hoop.
- Gently pull the chains off the top of the tire and spread them on the ground in front or behind the tire.
- Drive forward or backward a few feet to clear the chains from under the tire.
- Gather the chains carefully, avoiding tangles.
Maintenance and Storage for Longevity
After each use, especially if exposed to road salt, thoroughly clean your chains by rinsing off all salt, grit, and debris. Use plain water or a mild soap solution. Crucially, dry them completely before storage to prevent rust. Hang them up or lay them flat in the sun. Once dry, inspect them for wear or damage. Store them in a dedicated, breathable bag or container, away from moisture, ensuring they’re ready for future encounters, helping you discover their best lifespan.
Understanding Chain Wear and Replacement
Chains are a wear item. Clear indicators for replacement include: thin or stretched links, bent or severely worn cross-chains, broken tensioning devices, and excessive rust. Rust significantly impacts chain integrity, reducing tensile strength by a considerable margin and making them prone to breakage. The average lifespan of well-maintained chains is considerably longer than poorly maintained ones under similar usage conditions. Regular inspection ensures continued safety and optimal performance.
Selecting the correct chain type and size is paramount for vehicle compatibility and performance in adverse conditions. Thorough preparation, including a pre-installation check and understanding your vehicle’s drivetrain, streamlines the process. Following the detailed step-by-step installation guide precisely and performing a final tensioning ensures optimal fit and safety. Effective troubleshooting and adherence to safe driving practices maximize the benefits and extend chain lifespan. Proper removal and diligent maintenance are essential for chain longevity and readiness for future winter encounters. Master these techniques and practice your installation to confidently face winter’s challenges. Equip your vehicle with the right chains and drive securely, knowing you’ve taken every precaution for safe passage on snow and ice.
Frequently Asked Questions
Are tire chains difficult to put on?
Initially, installing tire chains can seem challenging, especially in cold, dark conditions. However, with practice and understanding the step-by-step procedure, the process becomes significantly easier. Familiarizing yourself with your specific chain type and performing a dry run before adverse weather is highly recommended to learn and master the technique efficiently.
Can I drive on bare pavement with tire chains?
No, driving on bare pavement with tire chains is strongly discouraged. It can cause significant damage to both your tires and the road surface, lead to poor handling, and may even damage vehicle components like fenders or brake lines. Chains should be removed immediately once road conditions no longer necessitate their use, ensuring you understand proper removal.
What speed should I drive with tire chains?
When driving with tire chains, it is crucial to maintain a reduced speed, typically not exceeding 25-30 mph (40-50 km/h). High speeds can cause chains to break, loosen, or damage your vehicle’s components due to centrifugal force. Always consult your chain manufacturer’s specific speed recommendations to ensure safety and prevent issues, helping you master safe driving.
Do tire chains go on the front or back wheels?
Tire chains should always be installed on the drive wheels of your vehicle. For front-wheel-drive (FWD) vehicles, they go on the front wheels. For rear-wheel-drive (RWD) vehicles, they go on the back wheels. For all-wheel-drive (AWD) or 4×4 vehicles, it’s generally recommended to install them on the front, but always refer to your vehicle’s owner’s manual to understand specific guidance.
How do I know what size tire chains I need?
You determine the correct tire chain size by looking at the tire sidewall, which displays a series of numbers and letters (e.g., P205/55R16). Chain manufacturers provide sizing charts that cross-reference these tire specifications to ensure a precise fit. An accurate fit is vital for proper function and to prevent vehicle damage, helping you discover the right solution.