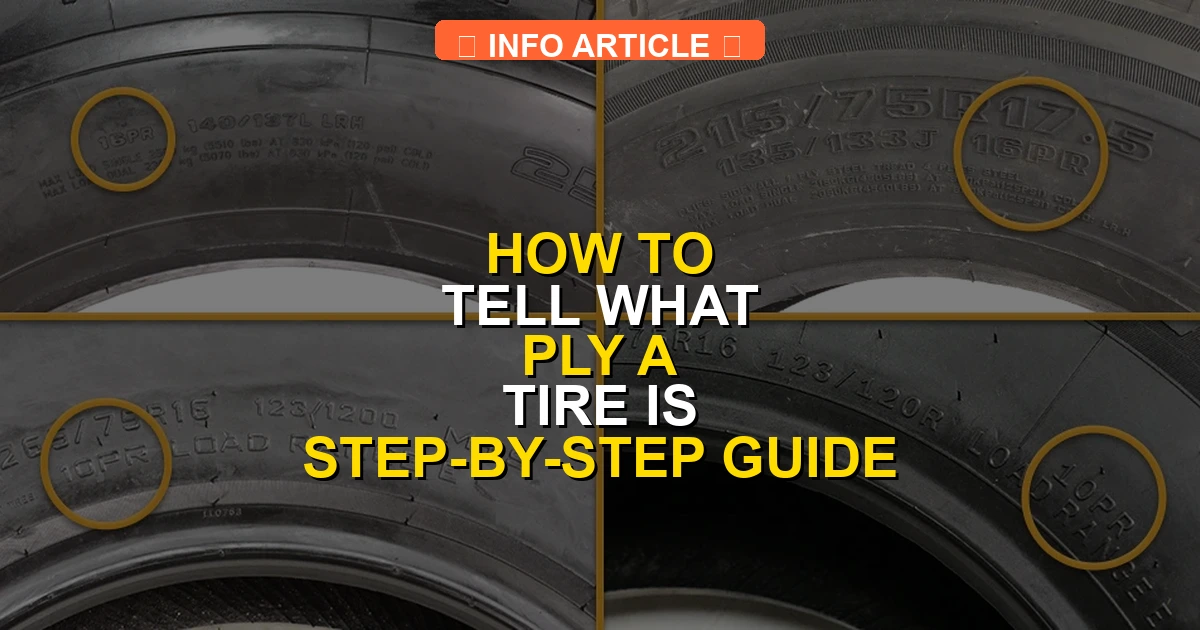
Knowing how to tell what ply a tire is requires inspecting the sidewall for specific manufacturing stamps and load range letters. Modern radial tires use Load Range letters instead of actual physical layers of fabric to indicate structural strength and weight capacity.
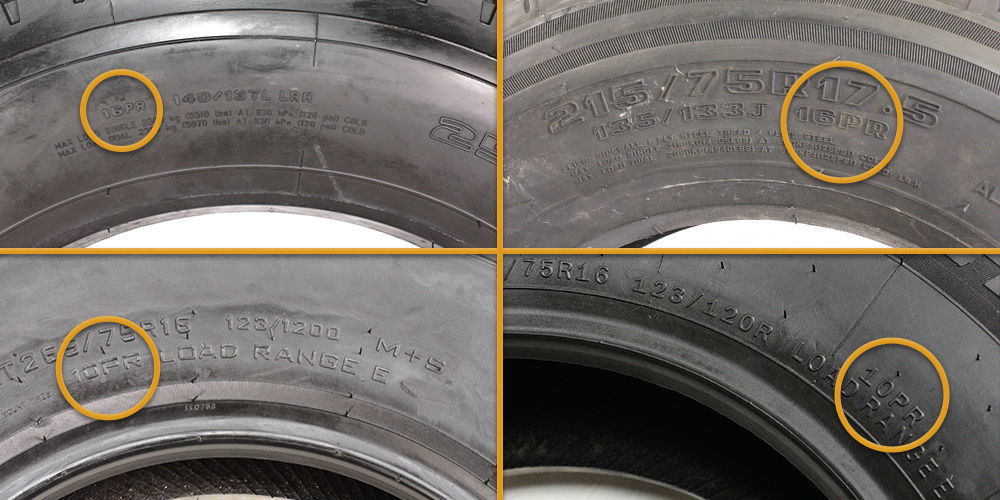
You can tell what ply a tire is by reading the Load Range letter or the explicit Ply Rating stamping located directly on the tire sidewall. In modern 2026 tire manufacturing, actual layers of fabric are rarely counted by hand; instead, manufacturers use standardized letter codes to indicate the tire’s overall strength and load-carrying capacity compared to older bias-ply standards.
Knowing this information is essential before you haul heavy loads or take your vehicle off-road. If you miscalculate your tire ply or load range, you risk premature tire failure, dangerous blowouts, or severe overloading under high pressure.
Key Takeaways
- Inspect the tire sidewall carefully for stamped text indicating ply rating or load range.
- Modern tires use letter codes like Load Range C, D, or E instead of physical ply counts.
- Passenger tires often display standard load or extra load (XL) ratings instead of ply counts.
- Check the maximum PSI and weight limits to cross-reference the tire’s actual load capacity.
- Consult the vehicle placard inside the driver door for original equipment tire specifications.
What Causes Confusion When Identifying Tire Ply Ratings
The Shift From Literal Plies to Load Ranges
Back in the era of old bias-ply tires, counting the actual layers of cotton or nylon cord physically built into the casing was straightforward. Today, radial tires use advanced steel belts and high-strength polyester cords. Because modern materials are exponentially stronger than older fabrics, a tire no longer needs ten physical layers of material to achieve a 10-ply strength level. This technical evolution creates confusion for drivers who expect to see a literal number stamped on the rubber.
Misinterpreting Passenger Car Metric Markings
Another common point of confusion is looking for ply information on standard passenger car tires. Most standard passenger tires use a SL (Standard Load) or XL (Extra Load) rating rather than a heavy-duty ply rating. If you search for a traditional ply number on a standard commuter car tire, you will not find it because those markings are intentionally reserved for light truck and commercial applications requiring higher inflation pressures.
Decoding Tire Construction Made Easy: Your Essential Action Plan
Understanding how to tell what ply a tire is plays a crucial role in vehicle maintenance, load management, and safety. While modern tires rarely use literal layers of cotton or nylon cord to count physical plies anymore, they still possess a ply rating system or structural equivalent that dictates their load-bearing capacity. This comprehensive guide covers everything you need to know to safely and accurately determine your tire construction specifications, saving you from potential blowouts and overloading hazards.
Step 1: Locate the Tire Sidewall Information Panel
What you need: A clean rag, a flashlight, and your vehicle parked on a flat surface with the steering wheel turned fully to expose the front tires.
Instructions: Walk around your vehicle and inspect the outer sidewall of each tire. Look for a dense cluster of raised lettering and numbers molded directly into the rubber. This area contains all the vital manufacturing data, safety certifications, and sizing codes. Wipe away any accumulated brake dust, mud, or road grime using your rag, and use your flashlight to illuminate the embossed text, as it can sometimes be difficult to read in dim garage lighting.
Pro Tip: Always check the sidewall when the tires are cool and clean to prevent misreading worn-down or obscured characters.
Step 2: Find the DOT Serial Number and Ply Markings
What you need: Your flashlight, a magnifying glass if your eyesight requires it, and patience to scan the full circumference of the tire.
Instructions: Search the lower sidewall near the wheel rim for the Department of Transportation (DOT) code, which starts with the letters “DOT” followed by a series of numbers and letters. Right near this code, or in a nearby isolated box, look for specific text labeling the internal construction. On passenger car tires, you will often find explicit disclosures stating the exact number of plies and the specific materials used in the tread and sidewall areas, such as “Tread: 2 Polyester + 2 Steel + 1 Nylon.”
Pro Tip: Passenger tires usually list internal plies directly, whereas light truck tires often rely on load ranges instead of literal ply counts.
Step 3: Decode Passenger Car Ply Disclosures
What you need: The exact text copied down from your tire sidewall regarding ply materials and counts.
Instructions: Examine the material breakdown listed on the sidewall. Manufacturers typically separate the information into “Tread” and “Sidewall” categories. For example, a standard passenger tire might read “Sidewall: 2 Polyester Plies.” This means the flexible side of the tire consists of two layers of polyester fabric cords. Understanding this helps you gauge the impact resistance and flexibility of the tire sidewall when navigating potholes or rough terrain.
Pro Tip: More polyester or rayon plies in the sidewall usually mean better ride comfort, while added nylon or steel layers increase high-speed durability.
Step 4: Identify Light Truck (LT) Load Ranges and Ply Ratings
What you need: Your vehicle’s Gross Vehicle Weight Rating (GVWR) sticker found on the driver-side door jamb, and your tire’s sidewall size code.
Instructions: If your vehicle uses Light Truck tires, look at the size designation (e.g., LT265/75R16) and find the Load Range letter immediately following the service description, such as “Load Range E.” Historically, Load Range C equated to a 6-ply rating, D to an 8-ply rating, and E to a 10-ply rating. Today, these letters do not mean there are literally ten layers of fabric; rather, they indicate the equivalent structural strength and maximum load capacity compared to older bias-ply tires.
Step 5: Cross-Reference with the Tire Placard
What you need: Access to the manufacturer placard located on the inside of the driver-side door jamb or inside the glove box.
Instructions: Open the driver’s door and locate the white and yellow placard. This factory-installed sticker tells you the original equipment tire size, recommended cold inflation pressures, and load limits. Compare these specifications with the physical tire currently mounted on your vehicle. If you are hauling heavy equipment, verifying that your tire’s load range and ply equivalent match or exceed the placard requirements ensures safe handling under maximum payload conditions.
Step 6: Consult the Manufacturer Specification Manual
What you need: Internet access on a smartphone or computer, and the exact brand, model, and size of your tire.
Instructions: If the sidewall text is weathered, ambiguous, or completely worn off, visit the official tire manufacturer website or consult an online tire database like Discount Tire or Tire Rack. Enter your exact tire dimensions and model name into their search engine. Open the specifications tab to view the detailed engineering data sheet, which will explicitly list the construction type, ply equivalents, maximum inflation pressure, and maximum load capacity.
✅ Final Checklist
- Located and cleaned the outer sidewall of the tire
- Identified the explicit ply material breakdown or Load Range letter
- Matched the tire specifications with the vehicle door jamb placard
- Cross-referenced confusing codes using the manufacturer’s official online catalog
- Confirmed that the tire’s load capacity matches your hauling and towing requirements
Important Notes:
- Never exceed the maximum pressure or load limits indicated on the tire sidewall, regardless of the calculated ply equivalent.
- If you notice bulging sidewalls, deep cracks, or exposed ply cords, seek professional help from a certified tire technician immediately as the tire must be replaced.
- Checking your tire specs takes approximately 10 to 15 minutes, and the process is entirely free unless professional inspection is required.
How to Fix Ply Rating Identification by Reading Sidewall Markings
Locating the Code on the Sidewall
To accurately determine your tire strength, crouch down and inspect the outer sidewall of your tire near the rim. Look for the size designation string (such as LT285/70R17) followed closely by a service description like 121/118Q. Right beside or underneath this block of text, you will find the Load Range designation, usually represented by a single capital letter from A through N, or occasionally printed outright as “Ply Rating = 10.”

Decoding Letters Into Equivalent Ply Numbers
Once you spot the Load Range letter, you must translate it into an equivalent ply rating to understand its actual capacity. Here is how standard modern light truck ratings translate:
- Load Range C: Equivalent to a 6-ply rating
- Load Range D: Equivalent to an 8-ply rating
- Load Range E: Equivalent to a 10-ply rating
- Load Range F: Equivalent to a 12-ply rating
By matching your specific letter to this scale, you instantly know the structural threshold of your rubber without needing to guess or reference the vehicle owner’s manual.
Step-by-Step Guide to Converting Load Range Letters to Ply Ratings
Modern tire manufacturing in 2026 relies almost exclusively on letter codes to indicate tire strength rather than physical ply counts. To determine the equivalent ply rating, you must cross-reference the stamped letter against standardized Tire and Rim Association guidelines.
Decoding the Letter System
Manufacturers stamp a letter following the tire size, such as LT265/70R17 E. This letter corresponds to a specific internal construction strength and maximum inflation threshold.
- Locate the service description and load range letter on your tire sidewall, typically found immediately after the load index and speed rating.
- Match the letter to its traditional ply rating equivalent using standard industry conversions: letters B and C generally equal 4 and 6 ply ratings respectively.
- Identify heavier duty ratings: D equals an 8-ply rating, E equals a 10-ply rating, and F denotes a 12-ply rating.
- Verify the maximum pressure limits associated with that letter, as higher load ranges require significantly higher PSI to achieve their maximum weight capacity.
What If It Still Doesn’t Work or Markings Are Worn Off?
If years of road wear, curb damage, or heavy mud have completely obliterated the sidewall markings, identifying the exact ply rating becomes challenging. Drivers cannot rely on guesswork when hauling heavy loads or navigating rough terrains in 2026.
- Check the inside sidewall, as manufacturers sometimes mold critical safety specifications, load ranges, and DOT serial numbers on the inward-facing side.
- Locate the original vehicle placard, usually found on the driver-side door jamb, which lists the exact OEM tire specifications and minimum required load index.
- Consult the vehicle owner’s manual or contact a certified tire dealer who can cross-reference your vehicle identification number (VIN) with factory build sheets.
- Visit a professional tire service center for a physical inspection if structural safety is in question. Professional inspections typically range from $20 to $50, and replacing compromised, unreadable tires ensures complete roadside safety.
Conclusion
Determining a tire’s ply rating or equivalent load range is essential for safe towing, heavy hauling, and proper vehicle maintenance. By decoding sidewall markings and referencing standardized letter conversions, drivers can accurately assess their tire strength. According to verified research and expert safety sources from the tire industry, matching the correct load range to your vehicle’s demands prevents dangerous blowouts. Take action today by inspecting your current tire sidewalls to confirm your load range meets your vehicle’s specific operational requirements.
❓ Frequently Asked Questions
How do I read the load range letter on my truck tire?
Look for a letter following the tire size, such as LT285/75R16E. The trailing ‘E’ indicates the load range, which correlates to a specific ply rating and maximum load capacity.
What is the difference between Load Range C, D, and E?
Load Range C corresponds to a 6-ply rating, Load Range D corresponds to an 8-ply rating, and Load Range E corresponds to a 10-ply rating. Each step up allows for higher maximum inflation pressure and heavier loads.
Why don’t my tires show a specific ply number?
Tire manufacturers transitioned from physical ply counts to load range letters because modern synthetic materials make tires stronger with fewer actual layers of fabric.
How do I determine ply strength if the sidewall markings are faded?
If sidewall markings are worn or unreadable, you can look up the tire’s exact DOT code and part number on the manufacturer’s official specifications website.
Does a higher ply rating mean a harsher ride?
Yes, tires with higher ply ratings and load ranges require higher air pressure and feature stiffer sidewalls, which can result in a firmer, rougher ride quality when unladen.
How does maximum PSI relate to tire ply rating?
Higher ply ratings require and support higher maximum PSI limits to safely carry heavier loads. Always match your inflation pressure to the load requirements and vehicle door placard.