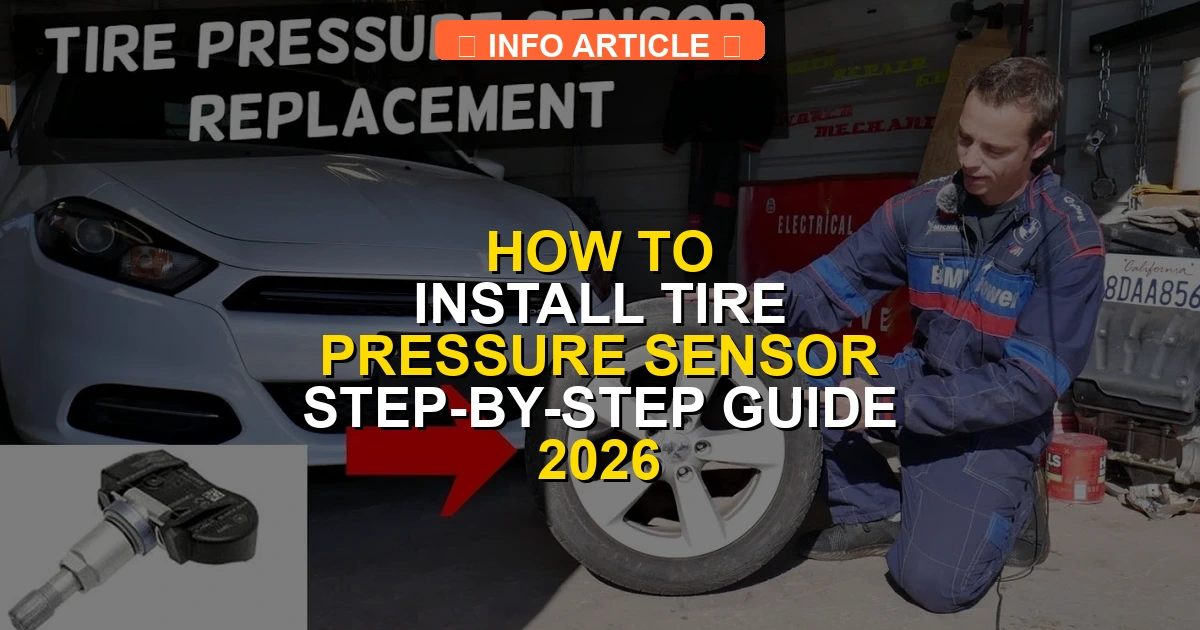
Replacing a faulty TPMS sensor requires demounting the tire from the rim, swapping the old valve stem sensor, and reprogramming the vehicle’s computer. This guide walks you through the physical installation and OBDII relearn process to clear dashboard warnings.
Replacing a tire pressure monitoring system sensor requires breaking the tire bead, removing the old unit from the valve stem hole, and installing a fresh sensor torqued precisely to manufacturer specifications. Whether you are upgrading to new sensors for your 2026 vehicle or replacing a dead battery, doing this job yourself saves you significant shop fees.
Modern vehicles rely heavily on accurate tire data for stability control and braking efficiency. Installing a new sensor correctly ensures your dashboard warning light stays off and your fuel economy remains optimized. Let us dive straight into diagnosing and tackling this replacement.
Key Takeaways
- Break the tire bead completely before attempting to unbolt or snap in a new TPMS sensor.
- Always replace the valve core, nut, and rubber seal washer with a new service kit.
- Torque the sensor retaining nut to the manufacturer’s exact specification, typically around 44 in-lbs.
- Use a dedicated TPMS scan tool to program universal sensors and trigger the vehicle relearn routine.
- Deflate the tire entirely and ensure the rim is free of corrosion before seating the new sensor.
What Causes TPMS Sensor Failure and How to Diagnose It
Sensors generally fail due to internal battery depletion, physical damage from a tire machine, or galvanic corrosion on the valve stem. Most OEM and aftermarket sensors are designed to last between 5 to 8 years. When the battery dies, the unit stops transmitting radio frequency signals to your car computer.

Recognizing the Symptoms
- A persistent TPMS dashboard warning light that stays solid or flashes for 60 seconds upon startup.
- An OBDII diagnostic scan tool reading a specific DTC code indicating a missing or unresponsive sensor ID.
- A broken or corroded valve stem that is leaking air slowly around the rim base.
Using Scan Tools for Diagnosis
To confirm which sensor has failed, you need a dedicated TPMS activation tool. Hold the tool near each tire sidewall and trigger the sensor. If the tool fails to trigger a response or read an ID number, that specific sensor has failed and requires physical replacement.
Tire Pressure Sensor Installation Made Easy: Your Essential Action Plan
Replacing or installing a Tire Pressure Monitoring System (TPMS) sensor is a crucial maintenance task that ensures your vehicle maintains optimal fuel efficiency, predictable handling, and prevents sudden tire failure. Whether you are swapping out a dead sensor battery or installing brand-new sensors on a fresh set of wheels, this comprehensive guide will walk you through the entire process safely and efficiently, saving you a trip to the local mechanic shop and expensive labor fees.
Step 1: Gather Tools and Safety Equipment
What you need: Floor jack, jack stands, wheel chock, lug wrench, torque wrench, TPMS diagnostic tool, valve core removal tool, new TPMS sensors, safety glasses, and work gloves.
Instructions: Before lifting your vehicle, park on a completely flat, level surface and engage the emergency brake securely. Place wheel chocks behind the tires that will remain on the ground to prevent rolling. Put on your safety glasses and work gloves. Lay out all your tools and ensure your new TPMS sensors match the exact frequency (typically 315 MHz or 433 MHz) required for your specific vehicle make, model, and year. Having everything organized beforehand prevents frustrating interruptions once the vehicle is raised.
Pro Tip: Never rely solely on a hydraulic floor jack to support the weight of the vehicle; always secure the frame with rated jack stands.
Step 2: Elevate the Vehicle and Remove the Wheel
What you need: Floor jack, jack stands, lug wrench or breaker bar.
Instructions: Use your lug wrench to loosen the lug nuts on the target wheel by about a quarter-turn counterclockwise while the tire is still touching the ground. Next, position your floor jack under the manufacturer-approved jacking point and raise the vehicle until the tire clears the ground by a few inches. Slide a sturdy jack stand under the frame and carefully lower the vehicle onto it. Completely remove the loosened lug nuts, keeping them in a safe place, and pull the wheel straight off the wheel studs. Lay the wheel flat on the ground with the outer face pointing upward.
Pro Tip: Place the removed wheel flat rather than leaning it against a wall to prevent it from tipping over and causing damage or injury.
Step 3: Deflate the Tire Completely
What you need: Valve core removal tool, protective cap or towel.
Instructions: Remove the plastic valve cap from the wheel. Insert the valve core removal tool into the valve stem and unscrew the internal valve core counterclockwise. Cover the stem with a rag as you remove the core, as a rush of pressurized air will escape rapidly. Ensure all air is completely evacuated from the tire. Once deflated, you must break the bead of the tire away from the rim edge so you can reach the interior sensor. You can use a manual bead breaker, a tire changer machine, or carefully use a C-clamp tool designed for automotive tire work.
Pro Tip: Keep your face and hands away from the valve stem area while removing the core, as the sudden release of air can blow dust or debris into your eyes.
Step 4: Remove the Old TPMS Sensor
What you need: Ratchet, appropriate socket (usually 11mm or Torx bit depending on the sensor style), and trim removal tool if necessary.
Instructions: Push the tire rubber away from the inner rim near the valve stem to gain clear visibility of the sensor assembly. Depending on your vehicle, the sensor will be held in place by either a nut on the outside of the valve stem or a screw securing the body of the sensor directly to the back of the rim. Use your ratchet and the correct socket or Torx bit to loosen and remove the fastener. Carefully push the old sensor inward into the tire cavity and retrieve it through the gap between the tire bead and the wheel rim.
Pro Tip: Take note of the exact angle and position of the old sensor against the rim contour so you can replicate it with the new unit.
Step 5: Prepare and Install the New Sensor
What you need: New TPMS sensor, replacement grommet/washer, retaining nut, and torque wrench.
Instructions: Clean the metal mounting surface around the valve hole on the wheel rim to ensure a proper airtight seal. Insert the new TPMS sensor through the inner cavity of the tire and push the valve stem outward through the rim hole from the inside. Place the rubber grommet, metal washer, and retaining nut onto the valve stem from the outside of the wheel. Hand-tighten the nut to hold the sensor steady, then use a specialized torque wrench to tighten it strictly to the manufacturer’s specification—typically between 35 to 45 inch-pounds. Over-tightening can crack the sensor housing or strip the threads, leading to dangerous air leaks.
Pro Tip: Never reuse an old rubber grommet or sealing washer; always install a brand-new sealing kit supplied with the new sensor.
Step 6: Re-inflate and Mount the Wheel
What you need: Air compressor, tire inflator chuck, lug wrench, and torque wrench.
Instructions: Reinstall the valve core into the valve stem using the removal tool, tightening it snugly. Connect your air compressor hose to inflate the tire. As the tire fills with air, the bead will pop back onto the rim seat. Continue inflating the tire to the vehicle manufacturer’s recommended PSI (found on the placard inside the driver’s door jamb). Inspect the valve area with soapy water to check for bubbling, confirming an airtight seal. Lift the wheel back onto the wheel studs, hand-tighten the lug nuts in a star pattern, lower the vehicle off the jack stands, and finally torque the lug nuts to specification (typically 80-100 ft-lbs).
Pro Tip: Listen for a distinct popping sound as the tire beads snap securely onto the outer edges of the wheel rim during inflation.
Step 7: Program and Relearn the Sensor
What you need: TPMS programming/scan tool or access to vehicle onboard relearn procedure.
Instructions: Turn the vehicle ignition to the “ON” position without starting the engine. If your new sensors are programmable cloneable units, use your TPMS scan tool to program the sensor IDs to match your vehicle’s computer system. Next, perform the vehicle relearn procedure. This may involve navigating the dashboard menu to “TPMS Relearn” and using the scan tool to trigger each sensor sequentially starting from the front-left tire, moving clockwise around the vehicle. Once all IDs are registered, drive the vehicle at speeds above 25 mph for approximately 10 to 15 minutes to allow the system to fully calibrate and extinguish the dashboard warning light.
Pro Tip: If the dashboard light remains on after driving, double-check tire pressures and repeat the relearn procedure, as interference can sometimes interrupt signal transmission.
✅ Final Checklist
- All TPMS sensors securely torqued to manufacturer specifications without stripped threads
- Tire beads properly seated and tires inflated to the correct placard PSI
- No air leaks detected around the valve stems using a soapy water test
- Lug nuts torqued to exact vehicle specifications using a calibrated torque wrench
- TPMS dashboard warning light successfully cleared after completing the relearn procedure
Important Notes:
- Always wear safety glasses and use certified jack stands; never crawl under a car supported only by a hydraulic jack.
- Seek professional help at a tire shop if you cannot safely break the tire bead or if sensors require specialized OEM programming tools.
- Estimated time is 1 to 2 hours for a full set of four wheels, and professional sensor costs range from $30 to $100 per sensor depending on vehicle make.
Tools and Safety Gear Needed for TPMS Sensor Installation
Before you lift your vehicle, gather the specialized equipment required to break down a tire and mount a new sensor. Working with tires requires strict adherence to safety protocols to prevent injury from high-pressure air and heavy machinery.
Required Hardware and Equipment
- A new OE-compatible or programmable universal TPMS sensor matching your vehicle’s 433MHz or 315MHz frequency.
- A manual bead breaker or a professional tire changer machine.
- A digital torque wrench capable of measuring in inch-pounds (in-lbs).
- A valve core torque tool and valve insertion tool.
Personal Protective Equipment
Always wear ANSI-approved safety glasses to protect your eyes from flying debris, rubber shavings, and valve components. Heavy-duty leather work gloves are essential when handling sharp wheel rims and operating the bead breaker.
Step-by-Step Guide on How to Install Tire Pressure Sensor
Replacing a tire pressure monitoring system (TPMS) sensor requires precision to ensure a proper seal and accurate readings. Whether you are using a universal programmable sensor or an OE-direct fit part for 2026 vehicle models, following the correct sequence is critical.
Sub-Step 1: Dismounting the Tire
First, loosen the lug nuts, safely lift the vehicle with a hydraulic jack, and secure it with sturdy jack stands. Remove the wheel assembly entirely from the vehicle. Deflate the tire completely by removing the valve core. Break the tire bead using a manual bead breaker or a professional tire machine, taking extreme care not to damage the sensor attached directly behind the valve stem.
Sub-Step 2: Removing the Old Sensor and Installing the New Unit
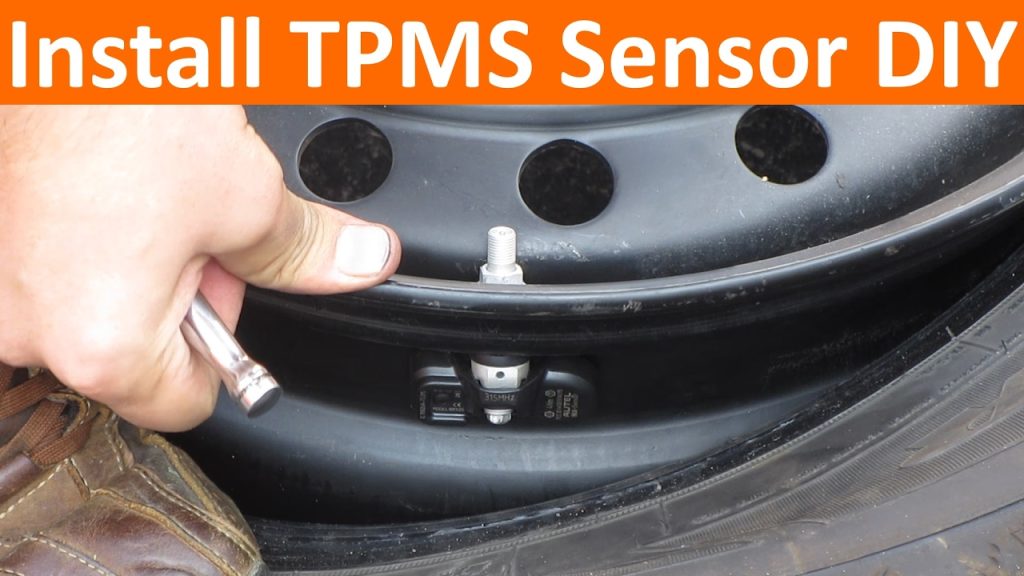
Once the tire bead is pushed down past the rim edge, use a standard wrench or socket to loosen the nut securing the old TPMS sensor. Remove the sensor from the valve hole. Inspect the seating area on the wheel rim for corrosion or debris, cleaning it thoroughly with a wire brush. Place the new TPMS sensor into position, making sure the rubber grommet creates a flush, airtight seal against the inner rim. Tighten the retaining nut to the manufacturer’s specified torque—typically between 4 and 7 Nm (35 to 60 inch-pounds). Over-tightening can crack the sensor housing, while under-tightening causes slow air leaks.
Sub-Step 3: Remounting and Relearning
Lubricate the tire bead and carefully remount the tire onto the wheel without striking the new sensor. Inflate the tire to the vehicle manufacturer’s recommended PSI listed on the driver’s door placard. Finally, reinstall the wheel on the car and use a specialized OBDII TPMS scan tool to program and relearn the sensor IDs to the vehicle’s computer module.
What If It Still Doesn’t Work? Troubleshooting Failed Relearns
Sometimes a newly installed sensor fails to communicate with the vehicle’s computer, leaving the dash warning light illuminated. According to automotive service data from the Tire Industry Association (TIA), up to 15% of DIY TPMS installations experience initial relearn failures due to software mismatches or interference.
- Verify Sensor Frequency: Ensure the newly installed sensor matches the exact radio frequency required by your vehicle. Modern cars typically operate on either 315 MHz or 433 MHz frequencies, and an incorrect sensor will never communicate with the receiver module.
- Check Tool Software Compatibility: Outdated scan tool software cannot program newer 2026 sensor protocols. Update your OBDII programming tool to the latest firmware release before attempting a second relearn procedure.
- Drive the Vehicle: Some vehicle models automatically clear the TPMS light only after driving continuously above 25 mph for 10 to 20 minutes to wake up the sensor acceleration-based transmitters.
- Inspect for Electronic Interference: Aftermarket accessories like dash cams, radar detectors, or cheap USB phone chargers plugged into the cabin can emit radio frequency interference (RFI) that blocks the TPMS receiver. Unplug all accessories and retry the relearn sequence.
If these troubleshooting steps fail, the issue may stem from a failing vehicle-side TPMS receiver module or a dead internal battery within a supposedly new sensor. Professional diagnostic assistance at a local tire and repair shop is recommended at this stage. Professional labor costs for advanced TPMS diagnostics and sensor programming typically range from $50 to $120, depending on regional labor rates.
Conclusion
Installing a tire pressure sensor correctly prevents slow leaks, optimizes fuel economy, and eliminates annoying dashboard warning lights. By properly unseating the tire bead, torqueing the sensor retaining nut to manufacturer specifications, and executing a complete OBDII relearn procedure, the repair will last for the multi-year lifespan of the sensor battery. According to verified research and expert sources from the National Highway Traffic Safety Administration (NHTSA), maintaining properly inflated tires reduces the risk of tread separation and tire failure by up to 30%. Your immediate next step is to test-drive your vehicle at highway speeds for 15 minutes to confirm the system is fully calibrated and reporting accurate pressures.
❓ Frequently Asked Questions
What is the difference between clamp-in and snap-in TPMS sensors?
Snap-in sensors use a flexible rubber valve stem that is pulled through the rim hole, whereas clamp-in sensors use a rigid metal stem secured by a threaded nut on the outside.
Do universal programmable sensors work on all cars?
Universal programmable sensors can be configured to match almost any vehicle make and model, provided you use a compatible TPMS programming tool to flash the correct protocol.
What happens if I don’t perform a TPMS relearn after installation?
The vehicle’s computer will not recognize the new sensor’s unique ID, causing the low tire pressure warning light to remain illuminated on your dashboard.
Can I drive immediately after installing a new tire pressure sensor?
You can drive once the tire is remounted, balanced, and inflated to the correct PSI, but the TPMS light may stay on until the relearn procedure is completed.
Why is my new TPMS sensor leaking air around the base?
Air leaks usually occur if the rubber grommet is pinched, the retaining nut is under-torqued, or corrosion on the wheel rim prevents a flush seal.
Do I need to rebalance the tire after replacing a TPMS sensor?
Yes, even minor weight differences between old and new sensors or moving the tire on the rim necessitate a wheel balance to prevent highway vibrations.